
Introduction
Crochet is more than just a craft—it’s a form of self-expression, creativity, and practical problem-solving. Yet one of the most common frustrations crocheters face is that store-bought or free online patterns rarely fit perfectly out of the box. Whether you’re making a cozy sweater, a fitted cardigan, or even accessories like hats and gloves, understanding how to customize crochet patterns to fit your measurements can transform your handmade wardrobe from “almost right” to “tailor-made.” This skill not only elevates your finished projects but also empowers you to confidently adapt any design to suit your unique body shape, style preferences, and yarn choices.
In this comprehensive guide, we’ll walk you through every essential step—from taking accurate body measurements and calculating gauge to adjusting stitch counts, shaping techniques, and garment construction. Whether you’re a beginner learning the basics or an experienced designer refining your process, mastering pattern customization unlocks endless creative possibilities. More importantly, it ensures your time, materials, and effort result in garments you’ll actually wear and love.
What This Topic Means for Crochet & Knitting Businesses

For handmade brands and independent designers, offering customizable patterns isn’t just a nice-to-have—it’s a strategic advantage. In many crochet businesses I’ve consulted with, the ability to provide clear guidance on personalization significantly boosts customer satisfaction and reduces returns or negative reviews. When buyers feel confident they can adjust a pattern to their size, they’re more likely to purchase digital downloads repeatedly.
Moreover, tutorials on how to customize crochet patterns to fit your measurements often become high-performing blog content. They attract organic traffic from crafters searching for solutions to ill-fitting garments—a pain point shared by thousands worldwide. From working with multiple crochet brands, I’ve seen firsthand how educational content around sizing builds trust, establishes authority, and nurtures long-term audience relationships. It positions your brand not just as a seller of patterns, but as a knowledgeable partner in the maker’s journey.
This approach aligns perfectly with current market trends: consumers increasingly value individuality, sustainability, and slow fashion. Custom-fit handmade clothing supports all three. By teaching your community to adapt patterns, you’re not only solving immediate problems—you’re fostering a deeper connection to the craft and encouraging mindful creation over mass consumption.
Why This Strategy Works Especially Well in the Crochet Community
Unlike commercial ready-to-wear fashion, which relies on standardized sizing (often inconsistent across brands), crochet thrives on flexibility. The very nature of hand-crocheted fabric—its drape, stretch, and texture—responds uniquely to different yarn weights, hook sizes, and stitch structures. This inherent variability means that rigid sizing charts rarely tell the full story.
Experienced designers often recommend treating published pattern sizes as starting points rather than final destinations. The crochet community has long embraced this mindset, sharing tips on forums, social media, and local guilds about how to tweak armhole depth, waist shaping, or sleeve length. There’s a culture of collaboration and adaptation that makes customizing crochet patterns to fit your measurements not just feasible, but expected.
Additionally, the rise of inclusive design movements within fiber arts has highlighted the limitations of traditional size ranges. Many makers now demand patterns that accommodate diverse body types—tall, petite, curvy, broad-shouldered, or plus-sized. Learning to customize empowers individuals to create garments that honor their bodies without waiting for industry-wide change. It democratizes fashion and puts creative control back in the hands of the maker.
Materials, Tools, or Resources Needed
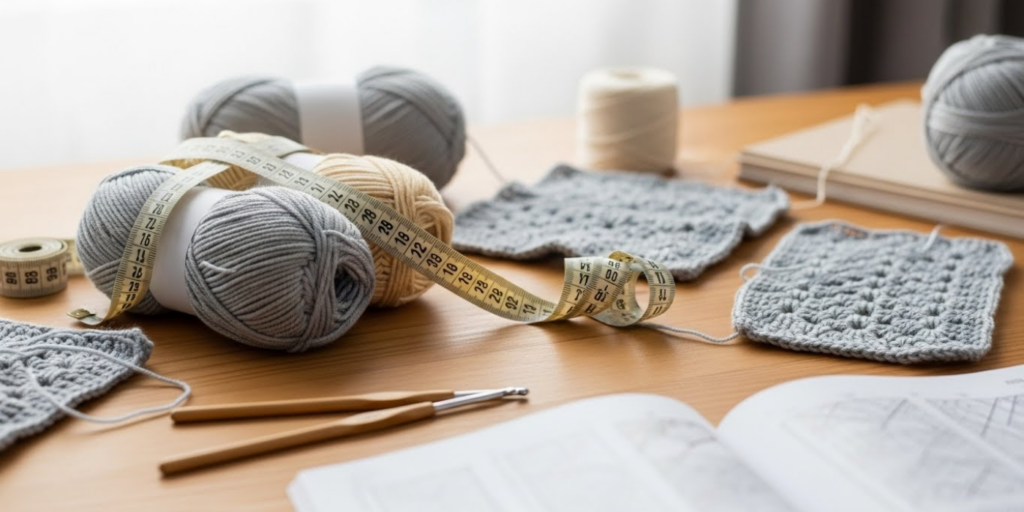
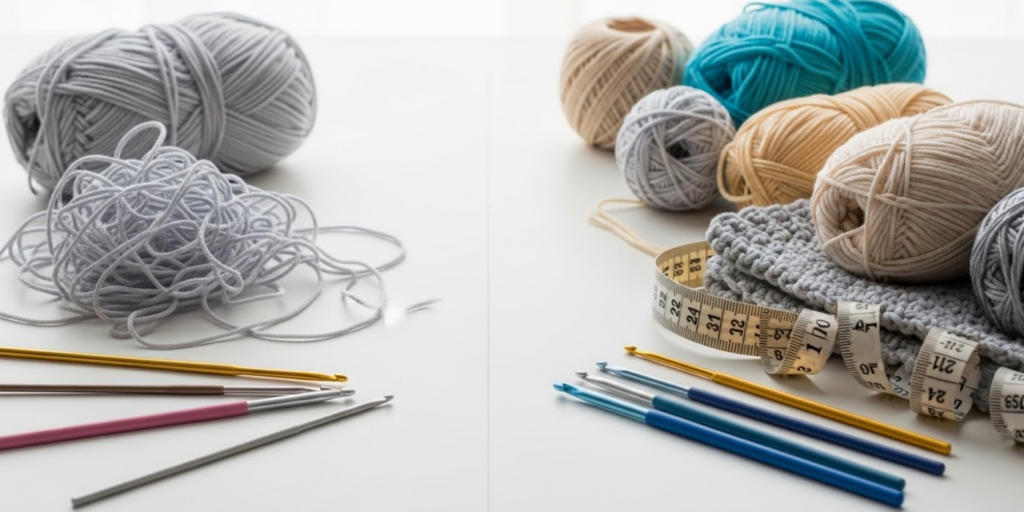
Before diving into adjustments, gather the right tools to ensure accuracy and efficiency:
- Measuring tape: A flexible, non-stretch fabric tape (not metal) is essential for taking body measurements.
- Notebook or digital spreadsheet: To record your measurements, gauge swatches, and calculations.
- Stitch markers: Helpful for marking key points during test swatches or garment assembly.
- Yarn and hook specified in the original pattern: Or a suitable substitute if modifying yarn weight.
- Scrap yarn: For practicing new stitches or testing shaping before committing to the main project.
- Ruler or gauge ruler: For precise measurement of swatch dimensions.
- Pattern worksheet templates (optional): Printable grids or digital tools to map out stitch counts and row heights.
Having these resources on hand streamlines the customization process and minimizes guesswork. Many seasoned crocheters keep a dedicated “fit kit” in their crafting space—this small investment pays off in confidence and consistency across projects.
Yarn Types and Fiber Considerations
The yarn you choose dramatically impacts how a garment fits—even if your stitch count is mathematically perfect. Natural fibers like cotton, linen, and bamboo have minimal elasticity and tend to grow with wear, especially when wet-blocked. Wool and wool blends offer more memory and bounce-back, making them forgiving for fitted styles. Acrylics vary widely; some are stiff and hold shape well, while others stretch permanently under tension.
When customizing a pattern, always consider:
- Drape: Lightweight yarns (fingering, sport, DK) create fluid silhouettes ideal for flowy tops. Bulky yarns add structure but may overwhelm delicate frames.
- Stretch: Highly elastic yarns (like wool or nylon blends) require tighter initial sizing since they’ll relax over time.
- Blocking behavior: Will the fabric expand 10% after washing? If so, account for that in your final dimensions.
- Gauge stability: Some yarns shift gauge dramatically between dry and wet states. Always swatch, wash, and block before finalizing measurements.
From working with multiple crochet brands, I’ve observed that mismatches between yarn behavior and intended fit cause more fitting issues than incorrect stitch counts alone. A lace-weight mohair sweater designed to be oversized will look disastrous if made in dense worsted-weight acrylic—regardless of accurate measurements. Always match fiber properties to the garment’s purpose.
Skill Level Breakdown
Beginner
If you’re new to crochet, start by customizing simple rectangular projects like scarves, cowls, or basic beanies. Focus on adjusting length or circumference using your head or neck measurement. Learn to read gauge swatches and understand how changing hook size affects fabric density. Avoid complex shaping (armholes, bust darts) until you’re comfortable with increases and decreases.
Intermediate
At this stage, tackle garments with minimal shaping—drop-shoulder sweaters, A-line skirts, or top-down raglans. You should be able to calculate stitch multiples, adjust row counts for length, and modify sleeve width. Practice reading schematic diagrams and comparing them to your body measurements. Begin experimenting with minor waist or hip shaping using gentle increases/decreases.
Advanced
Experienced crocheters can fully deconstruct and rebuild patterns. This includes adding bust darts, altering neckline depth, converting seamless constructions to seamed (or vice versa), and recalculating entire grading systems. You’ll understand how stitch pattern repeats interact with shaping and how to maintain design integrity while resizing. Advanced customization often involves drafting your own schematics based on personal measurements.
Regardless of level, patience and meticulous note-taking are your greatest allies. Even professionals re-swatch and recalculate—perfection comes from iteration, not intuition.
Step-by-Step Guide: How to Customize Crochet Patterns to Fit Your Measurements
Customizing a crochet pattern is methodical, not magical. Follow these detailed steps to achieve reliable results:
Step 1: Take Accurate Body Measurements
Use a soft measuring tape and stand naturally—don’t suck in your stomach or pull the tape too tight. Key measurements include:
- Bust/Chest: Around the fullest part (wear a supportive bra if applicable).
- Waist: At your natural waistline (usually above the navel).
- Hips: Around the fullest part, typically 7–9 inches below the waist.
- Shoulder width: From shoulder bone to shoulder bone across the back.
- Armhole depth: From top of shoulder to underarm.
- Sleeve length: From shoulder seam to wrist.
- Back length: From base of neck to waist.
- Torso length: From shoulder to desired hemline.
Record all numbers clearly. For garments with ease (intentional extra room), decide how much you want: negative ease (tight fit), zero ease (exact fit), or positive ease (loose fit). Most casual sweaters use 2–4 inches of positive ease at the bust.
Step 2: Swatch and Determine Your Gauge
Crochet a swatch at least 5×5 inches using the recommended hook and yarn. Work in the stitch pattern used for the main body (e.g., single crochet, double crochet, or a textured stitch). Wash and block it exactly as you plan to treat the finished garment.
Measure:
- Stitches per inch (or per 4 inches)
- Rows per inch (or per 4 inches)
Example: If your blocked swatch has 16 stitches and 20 rows over 4 inches, your gauge is 4 sts/inch and 5 rows/inch.
⚠️ Never skip blocking—unblocked swatches lie!
Step 3: Analyze the Original Pattern Schematic
Most quality patterns include a schematic—a line drawing with finished garment measurements. Compare these to your desired finished measurements (your body + ease).
Identify:
- Which areas need adjustment (bust, waist, hips, length, sleeves)?
- Is the garment constructed top-down, bottom-up, or in pieces?
- Are there stitch pattern repeats that must be maintained?
Step 4: Calculate New Stitch Counts
Use your gauge to convert measurements into stitches.
Formula:
Desired width (in inches) × stitches per inch = total stitches needed
Round to the nearest number that fits the stitch pattern repeat (e.g., if the pattern requires multiples of 3 + 2, adjust accordingly).
Example:
You want a 42-inch bust with 4 sts/inch → 42 × 4 = 168 stitches.
If the pattern repeat is “multiple of 4 + 1,” find the closest valid number: 169 (since 168 ÷ 4 = 42, remainder 0; 169 = 4×42 + 1).
Step 5: Adjust Row Counts for Length
Similarly, calculate rows needed for desired lengths.
Formula:
Desired length (in inches) × rows per inch = total rows
Apply this to body length, sleeve length, yoke depth, etc.
Step 6: Modify Shaping Sections
For fitted areas (waist, hips, bust), recalculate increase/decrease rates.
Example:
Original pattern decreases 2 sts every 4 rows over 20 rows to shape waist.
Your waist is 4 inches smaller than the pattern size.
At 4 sts/inch, that’s 16 fewer stitches needed.
Instead of decreasing 10 sts total (as in original), you need to decrease 16 + existing difference.
Distribute decreases evenly while maintaining symmetry. Use stitch markers to track shaping intervals.
Step 7: Test with a Muslin (Optional but Recommended)
For complex garments, crochet a simplified version (just front/back panels) in scrap yarn. Try it on to check fit before investing in expensive yarn. Adjust as needed.
Step 8: Document All Changes
Keep a master copy of the original pattern and annotate your modifications. This creates a personalized template you can reuse or share.
This systematic approach ensures every adjustment is intentional and proportional—no more guessing or frogging entire sleeves!
Common Mistakes and How to Avoid Them
Even experienced crocheters fall into predictable traps when customizing patterns. Here’s how to sidestep them:
1. Ignoring Ease
Mistake: Assuming “bust measurement = garment bust.”
Fix: Always add your preferred ease. A 36-inch bust doesn’t mean a 36-inch sweater—unless you want skin-tight!
2. Skipping the Blocked Swatch
Mistake: Using unblocked gauge, leading to a garment that grows 3 inches after washing.
Fix: Block your swatch exactly like the final piece. Measure only after it’s dry.
3. Forgetting Stitch Pattern Repeats
Mistake: Calculating 172 stitches but the pattern requires multiples of 6 + 4.
Fix: Round to the nearest valid number (e.g., 172 → 172 is 6×28 + 4? 6×28=168+4=172 → valid!). If not, adjust slightly.
4. Altering Only Width, Not Length
Mistake: Making a wider sweater but keeping original armhole depth, causing tight shoulders.
Fix: Proportionally adjust vertical dimensions too—especially armhole depth and yoke length.
5. Overcomplicating Early Projects
Mistake: Trying to add bust darts to your first sweater.
Fix: Start with length or circumference tweaks. Master fundamentals before advanced shaping.
6. Not Accounting for Yarn Substitution
Mistake: Swapping bulky for fingering weight without recalculating everything.
Fix: If changing yarn weight significantly, treat it as designing a new pattern—not just customizing.
Prevention beats correction. A few extra minutes of planning saves hours of unraveling.
Advanced Tips and Professional Insights
Beyond basic resizing, true customization involves understanding garment architecture. Here’s what seasoned designers do:
Use Grading Rules
Professional patterns follow consistent grading increments (e.g., +1.5″ bust, +0.5″ shoulder width per size). When scaling beyond the largest size, apply these ratios to maintain proportions.
Map Your Unique Shape
Standard measurements don’t capture everything. Do you have a long torso? Narrow shoulders? High hips? Note these nuances and adjust specific zones—e.g., add 2 inches only to the lower body section.
Leverage Negative Space
Sometimes fit is improved by removing fabric. Strategic short rows or darts can contour fabric to curves without adding bulk.
Maintain Design Integrity
If the original has a lace panel centered on the bust, ensure your resized version keeps it centered. Recalculate placement based on your new stitch count.
Consider Wearing Ease vs. Design Ease
Wearing ease = functional room to move. Design ease = stylistic volume (e.g., an oversized trend). Separate these mentally when planning adjustments.
From working with multiple crochet brands, I’ve learned that the best customizers think like engineers—they see garments as modular systems where changing one variable affects others. They also embrace “good enough” over perfection; handmade items have soul, not factory precision.
Real-World or Hypothetical Examples
Let’s walk through two realistic scenarios:
Example 1: The Petite Maker
Sarah is 5’1″ with a 34″ bust. She loves a free pattern for a drop-shoulder sweater graded for average height (5’5″–5’9″). The original has 28″ body length and 20″ sleeve length—too long for her frame.
Her solution:
- Keeps bust width (adds 2″ ease = 36″ finished).
- Shortens body by 3″ (to 25″) by reducing rows before armhole.
- Shortens sleeves by 2″ by starting cuff decreases earlier.
- Raises armhole depth slightly to avoid baggy underarms.
Result: A flattering, proportional sweater that looks designed for her.
Example 2: The Plus-Size Entrepreneur
Maria runs a small crochet business and wants to offer extended sizes for her popular cardigan pattern (originally S–L). Her customers request up to 5X.
Her process:
- Uses industry-standard grading rules (+2″ bust per size).
- Tests swatches in recommended yarn to confirm gauge holds at larger scales.
- Adds extra shaping rows for waist/hip definition in larger sizes (since straight rectangles can overwhelm curves).
- Includes detailed schematics showing finished measurements for each size.
- Offers a customization guide as a bonus download.
Outcome: Higher sales, glowing reviews, and a reputation for inclusivity.
These examples show that customization isn’t just personal—it’s a professional skill with real business impact.
Customization and Adaptation Ideas
Once you master basic resizing, explore creative adaptations:
- Convert Sleeves: Change cap sleeves to ¾-length by extending the sleeve cap and adding rows.
- Alter Necklines: Turn a crew neck into a V-neck by gradually decreasing stitches at the center front.
- Add or Remove Pockets: Integrate patch pockets by crocheting them separately and sewing on, or build them into side seams.
- Change Hem Styles: Swap a straight hem for a curved or asymmetrical one by varying row lengths.
- Adjust Closures: Replace buttons with a zipper or toggle ties based on preference.
- Modify Silhouette: Add waist ties to a boxy top for adjustable shaping.
The key is to isolate the element you want to change and assess how it connects to the rest of the garment. Small, intentional tweaks yield big personality boosts.
Care, Maintenance, or Best Practices
A perfectly fitted garment loses its shape without proper care. Follow these best practices:
- Always block finished pieces to set stitches and even out tension.
- Store folded, not hung, to prevent shoulder stretching (especially for heavy yarns).
- Hand-wash or gentle machine cycle in cold water with mild detergent.
- Reshape while damp and lay flat to dry—never wring or twist.
- Re-measure after first wash to confirm fit stability. If significant growth occurs, note it for future projects with that yarn.
Also, keep a “fit journal”: record your measurements, yarn used, gauge, ease added, and post-wash results. Over time, this becomes an invaluable reference for predicting outcomes.
Monetization Opportunities
Teaching others how to customize crochet patterns to fit your measurements opens several ethical, educational revenue streams:
- Digital Workshops: Offer live or recorded classes walking students through resizing a specific pattern.
- Customization Templates: Sell printable worksheets or Excel calculators for gauge conversion and shaping.
- Personalized Pattern Adjustments: Provide a service where customers send their measurements, and you return annotated pattern files.
- E-books or Guides: Compile your methodology into a premium resource (e.g., “The Crocheter’s Fit Handbook”).
- Affiliate Partnerships: Recommend quality measuring tapes, blocking mats, or yarns with disclosure.
Crucially, position these as empowerment tools—not quick fixes. The goal is to equip makers with lifelong skills, not dependency. This builds sustainable trust and recurring engagement.
Frequently Asked Questions (FAQ)
1. Can I resize a crochet pattern without knowing my gauge?
No. Gauge is the foundation of accurate customization. Without it, you’re guessing—and likely wasting yarn and time. Always swatch, block, and measure.
2. How much ease should I add for a sweater?
It depends on the style:
- Fitted: 0–2″ positive ease
- Casual: 2–4″ positive ease
- Oversized: 4–8″+ positive ease
Consider yarn drape and personal comfort.
3. What if my gauge matches stitch count but not row count?
Row gauge matters most for vertical elements (sleeves, body length). If off by more than 10%, try a different hook size or accept that you’ll need to adjust row counts manually.
4. Can I make a pattern larger than the biggest size listed?
Yes! Use the pattern’s grading increments (if provided) or calculate based on your measurements and gauge. Ensure shaping remains proportional.
5. Do I need to adjust armhole depth when resizing bust width?
Often, yes. Wider busts usually require deeper armholes to maintain shoulder mobility. Increase armhole depth by ¼–½” for every 2″ added to bust circumference.
6. How do I add bust darts to a crochet sweater?
Short-row darts are most effective: work extra rows over the bust area while keeping side seams straight. Many modern patterns include this; if not, search for “crochet bust dart tutorial” for step-by-step methods.
Conclusion
Learning how to customize crochet_patterns to fit your measurements is one of the most empowering skills you can develop as a fiber artist. It transforms you from a passive pattern follower into an active designer—capable of creating garments that celebrate your unique shape, style, and lifestyle. The process requires patience, precision, and practice, but the payoff is immeasurable: confidence in your creations, reduced waste, and the joy of wearing something truly yours.
Whether you’re making for yourself, gifting, or building a handmade business, customization is the bridge between generic instructions and personal expression. Start small, document your journey, and don’t fear mistakes—they’re lessons in disguise. With the tools and insights in this guide, you’re ready to take full ownership of your crochet wardrobe. Now grab your hook, your measuring tape, and begin crafting clothes that fit you, not the other way around.

Emily Parker is a passionate crochet artist and creative storyteller. With years of experience turning simple yarn into beautiful, unique pieces, she loves sharing tips, tutorials, and inspiration with fellow crafters. Emily believes that crochet is more than a hobby it’s a way to express creativity, spread joy, and connect with people through handmade art.


