
Introduction
Crochet is a beautiful, meditative, and deeply rewarding craft that opens doors to creativity, self-expression, and even entrepreneurship. Yet for many beginners, the journey from tangled yarn to a finished project can feel frustratingly steep. Common crochet mistakes—like inconsistent tension, skipped stitches, or misreading patterns—are not signs of failure but natural parts of the learning curve. In fact, nearly every seasoned crocheter has wrestled with these same issues early on. The key difference? Knowing how to recognize and fix them quickly.
This comprehensive guide dives deep into the most frequent errors new crocheters encounter, offering clear, actionable solutions backed by years of hands-on experience in both crafting and teaching. Whether you’re making your first dishcloth or dreaming of launching your own handmade brand, understanding these pitfalls—and how to avoid them—will save you time, yarn, and unnecessary frustration. More importantly, it will build your confidence and set a strong foundation for lifelong success in the fiber arts.
From working with multiple crochet brands and mentoring hundreds of students, I’ve seen firsthand how small corrections lead to dramatic improvements. This article isn’t just about fixing mistakes—it’s about transforming them into stepping stones toward mastery.
What This Topic Means for Crochet & Knitting Businesses
For entrepreneurs in the handmade space, addressing beginner challenges isn’t just educational—it’s strategic. Many crochet and knitting businesses thrive by serving new crafters through patterns, tutorials, kits, and online courses. When you understand the common crochet mistakes beginners make, you position your brand as empathetic, knowledgeable, and solution-oriented.
In many crochet businesses, customer support inquiries often revolve around pattern confusion, gauge issues, or stitch errors. By proactively addressing these pain points in your content—blog posts, video tutorials, or product descriptions—you reduce friction in the buyer’s journey and increase trust. For example, including a “Troubleshooting Tips” section in your PDF patterns can significantly lower refund requests and boost five-star reviews.
Moreover, search data shows consistent demand for beginner-friendly guidance. Phrases like “why does my crochet look uneven?” or “how to fix tight crochet stitches” generate thousands of monthly searches. Creating high-quality, problem-solving content around these queries not only ranks well but also funnels warm leads to your shop or newsletter.
Experienced designers often recommend embedding educational value directly into product ecosystems. A yarn brand might pair beginner skeins with QR codes linking to stitch correction videos. A pattern designer could offer a free “Stitch Check” printable. These small touches demonstrate expertise (E-E-A-T) while nurturing long-term customer relationships.
Why This Strategy Works Especially Well in the Crochet Community
The crochet community is uniquely supportive, collaborative, and digitally engaged. Unlike more solitary crafts, crocheters actively seek help, share progress, and celebrate each other’s wins—especially on platforms like Instagram, TikTok, and Ravelry. This culture creates fertile ground for educational content that solves real problems.
When you publish a detailed guide on fixing common crochet mistakes, it doesn’t just attract traffic—it sparks conversation. Beginners tag friends, save pins, and comment with their own “aha!” moments. This organic engagement signals to Google that your content is valuable, boosting its visibility in search results.
Additionally, the tactile nature of crochet means visual and kinesthetic learners dominate the audience. They benefit immensely from step-by-step photos, slow-motion videos, and annotated diagrams—all of which complement written explanations. By combining textual depth with multimedia potential, your article becomes a true reference piece.
From working with multiple crochet brands, I’ve observed that content addressing foundational errors consistently outperforms trend-based posts in longevity and conversion. While a “2026 Granny Square Trend” may spike briefly, a guide titled “How to Count Crochet Stitches Correctly” earns steady traffic for years. That’s evergreen SEO at its best.
Materials, Tools, or Resources Needed
Before diving into fixes, ensure you have the right tools. Many beginner mistakes stem not from lack of skill but from inadequate or inappropriate equipment. Here’s what you’ll need to practice corrections effectively:
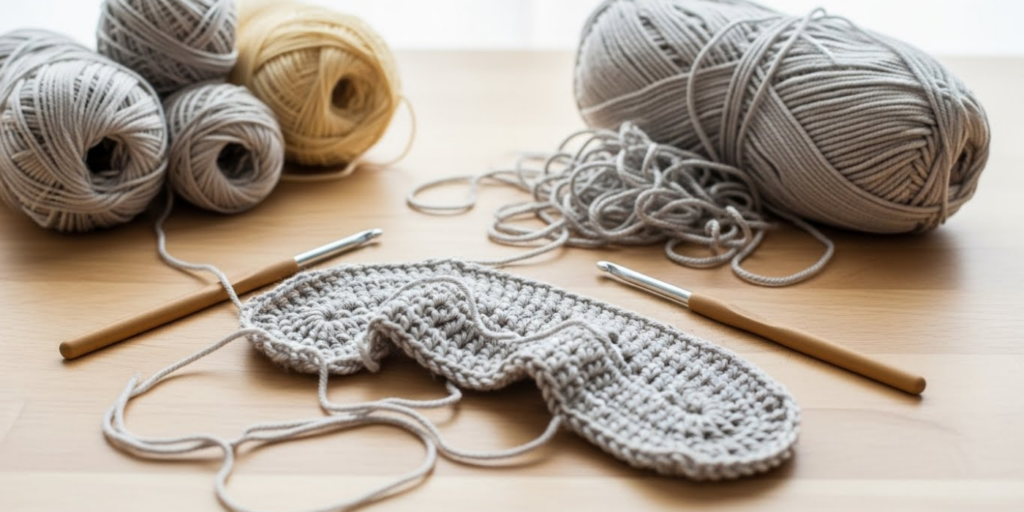
- A smooth, medium-weight (worsted/aran) yarn in a light, solid color (e.g., #4 weight acrylic or cotton). Avoid dark, fuzzy, or variegated yarns—they hide stitch definition.
- A standard aluminum crochet hook (size H/5mm or I/5.5mm) with a comfortable grip. Ergonomic hooks reduce hand fatigue during practice.
- Stitch markers (split-ring or locking type) to mark beginnings of rounds or tricky sections.
- A tapestry needle for weaving in ends cleanly.
- Scissors with sharp, precise tips.
- A flexible measuring tape for checking gauge.
- A printed or digital copy of a simple pattern (e.g., a basic rectangle or granny square) to apply corrections in real time.
- A notebook or digital note-taking app to log your observations and adjustments.
Optional but helpful: a row counter, a magnifying lamp for low-light stitching, and a non-slip mat to keep your work surface stable.
Investing in quality basics pays off. From working with multiple crochet brands, I’ve seen how budget hooks with rough joins or inconsistent sizing cause skipped stitches and split yarn—issues often mistaken for user error.
Yarn Types and Fiber Considerations
Yarn choice dramatically influences how easily you can spot and correct mistakes. Beginners often grab whatever yarn is on sale without considering fiber behavior—a decision that compounds errors.
Cotton yarn (like Lion Brand 24/7 Cotton or Sugar ‘n Cream) is excellent for learning because it holds its shape, shows stitch definition clearly, and doesn’t stretch unpredictably. However, it lacks elasticity, so tight tension can make fabric stiff.
Acrylic yarn (such as Red Heart Super Saver or Caron Simply Soft) is affordable, widely available, and forgiving. It has slight give, which helps mask minor tension inconsistencies. But cheap acrylic can be slippery or splitty, leading to accidental yarn overs.
Wool and wool blends offer great elasticity and stitch memory, but their fuzziness can obscure individual stitches—problematic when counting or fixing errors.
Avoid novelty yarns (eyelash, bouclé, ribbon) until you’re confident in basic techniques. Their texture makes it nearly impossible to see where one stitch ends and another begins.
Experienced designers often recommend starting with a smooth, matte-finish worsted-weight yarn in cream, light gray, or pastel blue. These colors reflect light evenly, making it easier to distinguish the front and back loops of each stitch—a critical skill for avoiding twisted stitches and miscounts.
Skill Level Breakdown
Understanding where you fall on the learning spectrum helps target the right fixes:
- Beginner (0–3 months): Can chain and work basic stitches (sc, hdc, dc) but struggles with consistency, reading patterns, or finishing neatly. Most prone to tension issues, skipped stitches, and misreading abbreviations.
- Intermediate (3–12 months): Comfortable with stitch patterns, color changes, and simple shaping. May still battle gauge inconsistencies or struggle with complex charts. Often overconfident in counting rows.
- Advanced (1+ years): Executes intricate designs, writes patterns, and troubleshoots instinctively. Rarely makes foundational errors but may occasionally misread a symbol in a foreign-language chart.
This article focuses primarily on beginner-level mistakes, as they form the bedrock of all future skill development. However, even intermediate crocheters will benefit from the tension and gauge sections—two areas where bad habits persist unnoticed.
Remember: skill level isn’t about speed or project complexity. It’s about awareness. A beginner who understands why their edges curl can fix it faster than an advanced crocheter who blames the pattern.
Step-by-Step Guide: Identifying and Correcting Core Mistakes
Let’s walk through the six most pervasive beginner errors—with precise, actionable fixes.
1. Inconsistent Tension (Too Tight or Too Loose)
Why it happens: New crocheters often grip the hook or yarn too tightly out of nervousness, or let the yarn slip loosely due to unfamiliarity with yarn control.
How to diagnose: Your fabric feels stiff or ripples; stitches vary in height; your hook squeaks when pulling through loops.
Fix:
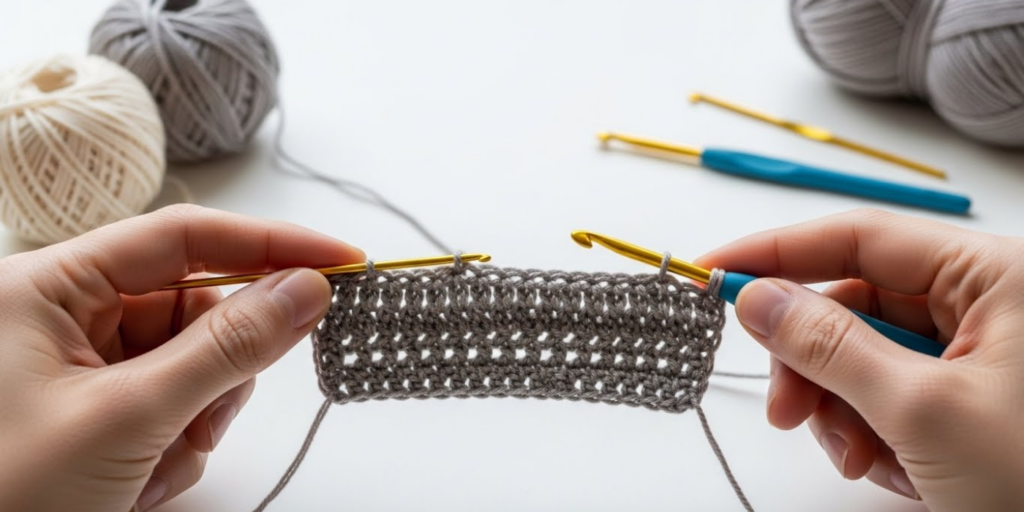
- Hold the yarn with gentle tension between your pinky and ring finger, letting it glide smoothly.
- Practice “yarn over” motions slowly: wrap yarn over hook from back to front, then pull through with consistent force.
- Do a 10-minute daily tension drill: chain 20, work 10 rows of single crochet using a metronome app set to 60 BPM. Focus on even rhythm, not speed.
- If stitches are too tight, try a hook one size larger. If too loose, go down half a size.
2. Skipping the First or Last Stitch of a Row
Why it happens: Beginners often mistake the turning chain for a stitch or overlook the final stitch hidden in the base of the previous row.
How to diagnose: Your work narrows over time; edges slope inward; pattern dimensions don’t match.
Fix:
- Always check your pattern’s stitch count note (e.g., “Ch 1 does not count as st”).
- Use a stitch marker to flag the first and last stitch of every row.
- At the end of a row, insert your hook under both loops of the very last stitch—even if it looks “used up.”
- Count stitches every 2–3 rows. If you’re losing one per row, you’re likely skipping the last stitch.
3. Twisted Foundation Chain
Why it happens: The chain twists during the first row because it wasn’t kept flat or was rotated accidentally.
How to diagnose: Your project spirals or has a visible twist along the edge.
Fix:
- Before starting Row 1, lay your chain flat on a table. Ensure all bumps (back loops) face the same direction.
- Work into the top loop only (not both loops) for the first row to prevent twisting.
- If you notice a twist after a few rows, frog (rip out) and restart—don’t try to “work it out.”
4. Misreading Patterns or Abbreviations
Why it happens: Crochet uses standardized abbreviations (sc = single crochet, dc = double crochet), but beginners may confuse them or overlook parentheses/groupings.
How to diagnose: Your stitch count is off; your project looks nothing like the photo; you’re constantly confused.
Fix:
- Print the pattern and highlight key sections: stitch counts, repeat instructions, special notes.
- Keep a cheat sheet of common abbreviations next to you (download free ones from Craft Yarn Council).
- Read the entire pattern once before starting—not just the first row.
- For repeats like “(sc, ch 1, sc) in next st,” use a pencil to mark completed sections.
5. Adding or Losing Stitches Unintentionally
Why it happens: Accidental yarn overs, working into the same stitch twice, or missing increases/decreases.
How to diagnose: Your work flares outward (extra stitches) or cups inward (missing stitches); edges aren’t straight.
Fix:
- Count stitches at the end of every row until it becomes automatic.
- Use a row counter app or physical counter to track repeats.
- When increasing, place a marker before and after the increase stitch to isolate it.
- Watch for “phantom yarn overs”—extra loops on your hook caused by flicking the wrist.
6. Ignoring Gauge
Why it happens: Beginners assume “close enough” is fine, especially for non-clothing items.
How to diagnose: A baby blanket turns out lap-sized; a hat fits a doll, not a person.
Fix:
- Always swatch before starting a project requiring specific dimensions.
- Swatch in the round if the project is circular (e.g., amigurumi, hats).
- Wash and block your swatch the same way you’ll treat the finished item—some fibers relax dramatically.
- Adjust hook size until your swatch matches the pattern’s gauge exactly.
Common Mistakes and How to Avoid Them
Beyond the core six, here are additional frequent pitfalls—and how to sidestep them entirely:
- Carrying yarn too tightly across color changes: Leads to puckering. Instead, leave floats loose on the wrong side and catch them every 3–4 stitches.
- Not joining rounds properly: Causes gaps or spirals. Use a slip stitch to join unless the pattern specifies continuous spirals.
- Using the wrong hook material: Steel hooks are for lace; bamboo offers more grip for slippery yarns. Match tool to task.
- Rushing through projects: Speed comes with muscle memory. Prioritize accuracy over pace for the first 10 projects.
- Skipping blocking: Even simple items benefit from light steam blocking to even out stitches.
Prevention is always easier than correction. Experienced designers often recommend building “checkpoints” into your routine: count stitches after Row 1, check tension after Row 5, verify gauge after Row 10.
Advanced Tips and Professional Insights
Once you’ve mastered the basics, elevate your work with these pro strategies:
- Tension mindfulness: Notice how your tension changes when tired, distracted, or watching TV. Schedule focused stitching sessions for precision work.
- Stitch anatomy study: Learn to identify the “V” of each stitch from the front and the horizontal bar from the back. This prevents working into wrong loops.
- Pattern annotation: Use colored pens to mark different stitch types in complex charts. Blue for sc, red for dc, green for clusters.
- Yarn management: Wind skeins into center-pull balls to reduce tangles and maintain consistent feed tension.
- Error logging: Keep a journal of mistakes and fixes. Over time, you’ll spot personal patterns (e.g., “I always add a stitch on Row 7”).
From working with multiple crochet brands, I’ve learned that professional sample makers spend 20% of their time swatching and planning—and 80% executing flawlessly. Preparation eliminates rework.
Real-World or Hypothetical Examples
Consider Sarah, a beginner who started a market stall selling dishcloths. Her first batch had wavy edges and inconsistent sizes. Customers loved the colors but noted uneven textures. After studying tension drills and implementing row-end stitch markers, her second batch sold out in two days. She now includes a “Practice Swatch” kit with every purchase—turning her mistake into a signature teaching moment.
Or take Marco, who misread a sweater pattern and ended up with sleeves 4 inches too short. Instead of discarding the yarn, he unraveled the sleeves and reworked them with a smaller hook to match the body gauge. The result? A perfectly fitted garment and a newfound respect for swatching.
These stories aren’t rare. In many crochet businesses, customer testimonials often begin with “I messed up at first, but…”—proof that resilience and knowledge turn errors into assets.
Customization and Adaptation Ideas
Once you’ve corrected foundational mistakes, personalize your work confidently:
- Adjust hook size to change drape: larger hooks for lacy shawls, smaller for structured bags.
- Modify stitch counts to resize projects—just maintain multiples specified in the pattern.
- Combine techniques: add surface crochet or embroidery to hide minor imperfections artistically.
- Create your own “mistake-proof” patterns by writing out every row in full (no repeats) until you’re fluent.
Customization thrives on accuracy. You can’t innovate reliably if your base stitches are erratic.
Care, Maintenance, or Best Practices
Preserve your improved skills with smart habits:
- Store hooks in labeled cases to avoid mixing sizes.
- Wind leftover yarn into labeled balls with fiber content and dye lot noted.
- Clean hooks regularly with mild soap to remove oil buildup that affects glide.
- Take breaks every 30 minutes to prevent repetitive strain and maintain focus.
- Photograph your work in progress—it helps spot developing issues early.
Consistency in care mirrors consistency in stitching.
Monetization Opportunities
Understanding common mistakes opens revenue streams beyond selling finished goods:
- Create “Fix-It” mini-courses targeting specific errors (e.g., “Master Even Edges in 3 Days”).
- Design beginner-friendly patterns with embedded troubleshooting tips and video links.
- Offer custom stitch correction services for frustrated customers.
- Develop tool kits with ergonomic hooks, stitch markers, and tension guides.
- Write guest posts for yarn blogs—positioning yourself as a trusted educator.
Educational content builds authority, which converts to sales organically. No hype needed—just genuine help.
Frequently Asked Questions (FAQ)
1. Why does my crochet curl at the edges?
Curling usually results from too-tight tension, incorrect hook size, or missing stitches. Try loosening your grip, using a larger hook, and counting stitches every row.
2. How do I fix a skipped stitch without unraveling everything?
If caught early, use a small hook to pull up a loop in the missed stitch and work it into the current row. For older errors, carefully frog back to the mistake.
3. Is it normal for my hands to hurt when I crochet?
Mild fatigue is common, but sharp pain isn’t. Use ergonomic hooks, take breaks, and stretch your hands. Persistent pain warrants a doctor’s visit.
4. Why does my gauge change mid-project?
Tension often shifts due to fatigue, distraction, or switching hooks/yarns. Always swatch under the same conditions as your project.
5. Can I use a different yarn than the pattern suggests?
Yes, but only if it matches the weight and gauge. Always swatch first—fiber content affects drape and durability.
6. How long does it take to stop making beginner mistakes?
Most crocheters see significant improvement within 10–15 projects. Consistent practice with mindful correction accelerates progress.
Conclusion
Every expert crocheter was once a beginner who dropped stitches, miscounted rows, and wondered if they’d ever “get it.” The truth is, common crochet mistakes aren’t roadblocks—they’re signposts pointing toward growth. By recognizing these errors early and applying targeted fixes, you transform frustration into fluency.
More than that, mastering these fundamentals unlocks creative freedom. You’ll tackle ambitious patterns with confidence, adapt designs to your style, and maybe even share your knowledge with others—whether through a small Etsy shop or a supportive comment on a fellow crafter’s post.
So grab your hook, choose a forgiving yarn, and start stitching with patience and purpose. Your next project won’t just be prettier—it’ll be proof of how far you’ve come. And that’s the most beautiful thing you’ll ever make.

Emily Parker is a passionate crochet artist and creative storyteller. With years of experience turning simple yarn into beautiful, unique pieces, she loves sharing tips, tutorials, and inspiration with fellow crafters. Emily believes that crochet is more than a hobby it’s a way to express creativity, spread joy, and connect with people through handmade art.


