
Introduction
If you’ve ever walked into a yarn shop or scrolled through an online store only to feel overwhelmed by the sheer variety of options, you’re not alone. One of the most foundational—yet frequently misunderstood—aspects of knitting and crocheting is yarn weights. Understanding what yarn weights mean isn’t just about choosing something that looks pretty; it directly impacts your project’s drape, durability, stitch definition, and even how long it takes to finish. Whether you’re crafting a cozy blanket, a delicate lace shawl, or a structured market tote, selecting the right yarn weight is as critical as picking the correct hook or needle size.
For beginners, the term “yarn weight” can be misleading—it doesn’t refer to how heavy a skein is on the scale, but rather to the thickness of the individual strand. This distinction is essential because using the wrong weight can lead to garments that don’t fit, blankets that are too stiff (or too flimsy), or projects that consume far more yarn than budgeted. In this comprehensive guide, we’ll demystify yarn weights, explain the standardized system used across the industry, and show you exactly how to choose the right one for every project. You’ll also learn how this knowledge can elevate your handmade business, improve customer satisfaction, and reduce costly mistakes in production.
By the end of this article, you won’t just understand yarn weights—you’ll confidently use them as a strategic tool in both your craft and your creative enterprise.
What This Topic Means for Crochet & Knitting Businesses
For handmade entrepreneurs—whether you sell finished goods, patterns, or curated yarn kits—mastery of yarn weights is non-negotiable. In many crochet businesses I’ve consulted with, miscommunication about yarn weight was the leading cause of customer returns, negative reviews, and wasted materials. A customer orders a “chunky” scarf based on a photo, but receives something made with worsted-weight yarn that lacks the expected volume and texture. The result? Disappointment and lost trust.
Understanding yarn weights allows you to:
- Write accurate, reliable patterns that yield consistent results across different makers.
- Curate product bundles (e.g., “Beginner Blanket Kit”) with confidence that the included yarn matches the project’s needs.
- Provide superior customer service by guiding buyers toward the right substitutions when their preferred yarn is out of stock.
- Optimize inventory costs by knowing which weights sell best for specific item categories (e.g., fingering for socks, bulky for home decor).
From working with multiple crochet brands over the past decade, I’ve seen firsthand how shops that educate their audience about yarn weights build stronger brand loyalty. Customers return not just for products, but for the expertise they trust.
Why This Strategy Works Especially Well in the Crochet Community
The crochet community thrives on accessibility and creativity—but without foundational knowledge, beginners often hit frustrating roadblocks. Unlike machine-knit garments, handmade items rely entirely on human interpretation of materials and instructions. That’s why clear, practical education around yarn weights resonates so deeply.
Experienced designers often recommend starting new crocheters with worsted-weight (#4) yarn because it’s forgiving, widely available, and shows stitch definition clearly. But once makers understand the full spectrum—from lace (#0) to jumbo (#7)—they unlock endless possibilities: airy summer tops, plush baby blankets, sturdy market bags, and even sculptural art pieces.
Moreover, social media platforms like Instagram and TikTok have amplified visual learning. When a maker posts a time-lapse of a bulky-weight cowl coming together in under two hours, it inspires others to try similar projects. But without understanding that “bulky” refers to a specific weight category—not just “thick yarn”—followers may substitute incorrectly and end up discouraged.
Teaching yarn weights empowers your audience to make informed choices, reduces support queries, and positions your brand as a trusted authority.
Materials, Tools, or Resources Needed
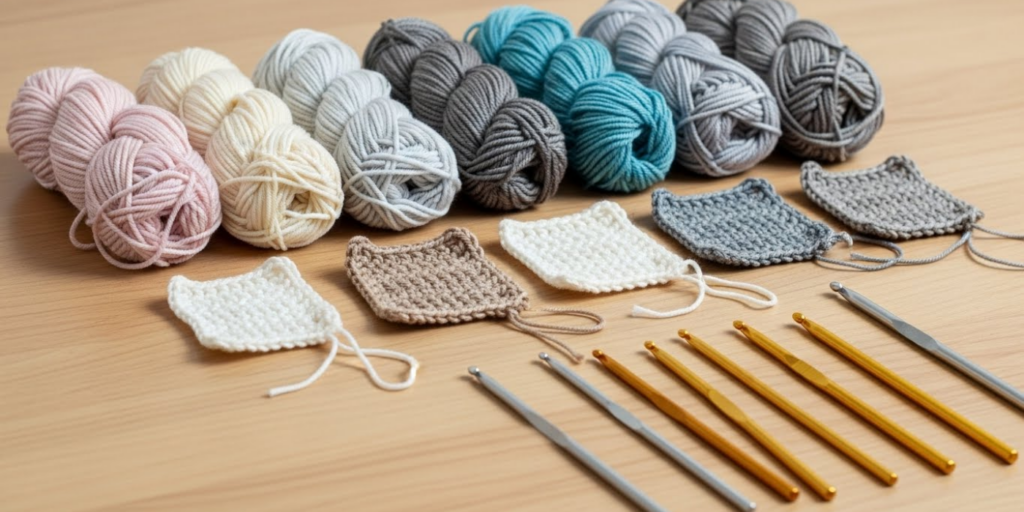
Before diving into yarn selection, gather these essential tools:
- Yarn labels: Always check the official label—it contains the weight symbol, recommended gauge, fiber content, and care instructions.
- Wraps per inch (WPI) tool or ruler: For unlabeled or mystery yarns, WPI helps determine weight empirically.
- Standardized needle/hook conversion chart: Helps match yarn weight to appropriate tool size.
- Swatch notebook: Record your test swatches with yarn name, weight, hook/needle size, and resulting gauge.
- The Craft Yarn Council’s Standard Yarn Weight System guide: A free, printable reference used by manufacturers worldwide.
Having these resources on hand ensures you’re never guessing—you’re making data-driven decisions.
Yarn Types and Fiber Considerations
While yarn weight defines thickness, fiber content influences behavior. Two worsted-weight yarns—one 100% cotton, another 100% acrylic—can behave very differently despite sharing the same weight classification.
Common fibers and their characteristics by weight:
- Lace (#0) & Fingering (#1): Often wool, silk, or blends. Ideal for shawls and socks due to drape and elasticity.
- Sport (#2) & DK (#3): Frequently used in baby clothes; cotton or bamboo blends offer softness and breathability.
- Worsted (#4): The workhorse weight. Acrylic, wool, and cotton dominate here—great for amigurumi, sweaters, and blankets.
- Bulky (#5) & Super Bulky (#6): Wool, chenille, or roving-style fibers create warmth and speed. Avoid slippery fibers like rayon in these weights for structural items.
- Jumbo (#7): Typically 100% wool roving or t-shirt yarn. Used for arm knitting or rug-making.
From working with multiple crochet brands, I’ve learned that fiber affects perceived weight. A dense cotton worsted may feel heavier than a lofty wool worsted, even if both are labeled #4. Always swatch!
Skill Level Breakdown
Beginner
Stick to worsted-weight (#4) yarn. It’s medium-thickness, easy to see stitches, and forgiving of tension inconsistencies. Recommended fibers: acrylic or wool blends—they’re affordable, widely available, and hold shape well.
Intermediate
Experiment with DK (#3), bulky (#5), and fingering (#1). These require more attention to gauge and drape. Try cotton DK for lightweight garments or super bulky for quick home decor.
Advanced
Master lace (#0) and jumbo (#7). Lace demands precision and blocking; jumbo requires spatial awareness and strong hands. Advanced makers also blend weights intentionally—e.g., holding two strands of fingering to mimic DK.
Step-by-Step Guide to Understanding and Using Yarn Weights
Step 1: Learn the Standard Yarn Weight System
The Craft Yarn Council (CYC) established a universal numbering system from 0 to 7:
| Number | Name | Typical Uses | Knitting Needle (US) | Crochet Hook (mm) |
|---|---|---|---|---|
| 0 | Lace | Shawls, doilies | 000–1 (1.5–2.25 mm) | Steel 1.6–1.4 mm |
| 1 | Super Fine | Socks, baby items | 1–3 (2.25–3.25 mm) | 2.25–3.5 mm |
| 2 | Fine (Sport) | Lightweight garments | 3–5 (3.25–3.75 mm) | 3.5–4.5 mm |
| 3 | Light (DK) | Sweaters, baby blankets | 5–7 (3.75–4.5 mm) | 4.5–5.5 mm |
| 4 | Medium (Worsted) | Afghans, scarves, amigurumi | 7–9 (4.5–5.5 mm) | 5.5–6.5 mm |
| 5 | Bulky | Rugs, hats, quick blankets | 9–11 (5.5–8 mm) | 6.5–9 mm |
| 6 | Super Bulky | Arm knitting, thick cowls | 11–17 (8–12.75 mm) | 9–15 mm |
| 7 | Jumbo | Sculptural pieces, rugs | 17+ (12.75+ mm) | 15 mm+ or arms |
This system appears on nearly all commercial yarn labels in North America and increasingly worldwide.
Step 2: Read the Yarn Label
Look for:
- The weight number (e.g., “4” inside a diamond)
- Recommended gauge (e.g., “16 sts = 4 inches on US 8”)
- Fiber content
- Dye lot (critical for large projects)
Never skip this—even if you recognize the brand, dye lots and formulations change.
Step 3: Measure Wraps Per Inch (WPI)
For unlabeled yarn (thrifted, inherited, or hand-spun):
- Wrap yarn snugly around a pencil or WPI tool for 1 inch.
- Count the wraps.
- Compare to this guide:
- 18+ WPI = Lace (#0)
- 14–17 WPI = Fingering (#1)
- 12–14 WPI = Sport (#2)
- 11–12 WPI = DK (#3)
- 9–11 WPI = Worsted (#4)
- 7–9 WPI = Bulky (#5)
- 5–6 WPI = Super Bulky (#6)
- 1–4 WPI = Jumbo (#7)
This method is invaluable for stash organization.
Step 4: Swatch Religiously
Make a 4×4 inch swatch using the recommended hook/needle size. Wash and block it if the final item will be laundered. Measure your gauge. If it doesn’t match the pattern, adjust your tool size—don’t assume the yarn is “wrong.”
Step 5: Substitute Wisely
Need to replace a discontinued yarn? Match:
- Weight number
- Fiber content (or similar behavior)
- Yardage per skein
- Gauge
Example: Replacing a #4 wool with 200 yards/skein? Choose another #4 wool with ~200 yards—not a #4 cotton with 150 yards, which will be denser.
Step 6: Plan Yardage Accurately
Thicker yarns cover more area per yard but use more grams per stitch. Use a yarn calculator or the formula:
Total yards needed ÷ yards per skein = number of skeins
Always buy 10–15% extra for error or future repairs.
Common Mistakes and How to Avoid Them

Mistake 1: Assuming “Chunky” Means Any Thick Yarn
“Chunky” is a marketing term, not a standard. It could mean #5 (bulky) or #6 (super bulky). Always check the CYC number.
Fix: Ignore poetic names (“cloud,” “whisper,” “mega”) and look for the numeric weight.
Mistake 2: Skipping the Swatch
“I’m just making a scarf—it doesn’t need to fit!” Even accessories rely on drape and density. A too-loose worsted scarf may stretch into a net; too-tight bulky may feel like cardboard.
Fix: Swatch every time, especially with new yarn.
Mistake 3: Substituting by Skein Weight, Not Yardage
Two skeins both weigh 100g, but one has 200 yards, the other 100. Using the shorter one will leave you yarn-short.
Fix: Calculate by yardage, not grams.
Mistake 4: Ignoring Fiber Behavior
Using 100% cotton in a lace-weight shawl? It may lack the bounce and drape of wool-silk blends.
Fix: Match fiber to project function—elasticity for wearables, stability for home goods.
Mistake 5: Overlooking Dye Lots
Even slight color variations between dye lots can create visible stripes in large projects.
Fix: Buy all skeins at once, from the same dye lot.
Advanced Tips and Professional Insights
Tip 1: Hold Strands Together to Create New Weights
Holding two strands of fingering (#1) ≈ DK (#3).
Two strands of sport (#2) ≈ worsted (#4).
This expands your stash versatility and creates unique textures.
Tip 2: Understand “Gauge Tolerance”
Some patterns (e.g., blankets, scarves) are “gauge tolerant”—exact size doesn’t matter. Others (garments, toys) are not. Adjust weight only in tolerant projects.
Tip 3: Use Weight to Control Project Time
Need a gift in 48 hours? Choose super bulky (#6) or jumbo (#7). A cowl can be done in one evening. Conversely, lace-weight projects demand patience.
Tip 4: Leverage Weight for Texture Play
Alternate rows of worsted and bulky in a blanket for ribbed dimension. Or use thin yarn with a large hook for an open, lacy fabric.
Tip 5: Educate Your Customers
In your Etsy listings or blog, include a “Yarn Weight Explained” section. Example:
“This pattern uses #4 worsted-weight yarn (like Lion Brand Basic Stitch or Paintbox Simply Aran). Do not substitute with ‘chunky’ yarn unless you re-swatch—your bag will be too stiff.”
This reduces support tickets and builds trust.
Real-World or Hypothetical Examples
Example 1: The Amigurumi Entrepreneur
Sarah sells crochet animals online. She initially used whatever worsted yarn was on sale. Customers complained some bunnies were floppy, others rock-hard. After standardizing to a specific #4 100% acrylic with 180 yards/100g and consistent tension, her returns dropped by 70%. She now lists exact yarn specs in every product description.
Example 2: The Pattern Designer
Mark released a “Cozy Winter Cowl” pattern calling for “chunky yarn.” Buyers used everything from #4 to #7. Feedback ranged from “too flimsy” to “couldn’t fit over my head.” He revised the pattern to specify “#6 super bulky, 60–70 yards required, gauge: 8 sc = 4 inches on 10mm hook.” Sales increased, and his 5-star reviews mentioned clarity.
Example 3: The Yarn Shop Owner
Lena organized her physical store by CYC weight numbers, not colors or brands. She added WPI rulers and swatch cards. Beginners spent less time confused, and advanced customers appreciated the precision. Her workshop on “Yarn Weight Mastery” sold out monthly.
Customization and Adaptation Ideas
- For Sensory Needs: Use super bulky cotton for weighted lap blankets—soft yet dense.
- For Eco-Conscious Makers: Substitute conventional worsted with recycled cotton #4 for dishcloths.
- For Luxury Items: Combine lace-weight silk (#0) with fine mohair (#1) for a halo effect in shawls.
- For Kids’ Crafts: Use jumbo (#7) t-shirt yarn with fingers (no hook!) for instant gratification.
- For Travel Projects: Carry fingering-weight socks in progress—they’re small and use minimal yarn.
Adaptation isn’t deviation—it’s intelligent customization based on weight knowledge.
Care, Maintenance, or Best Practices
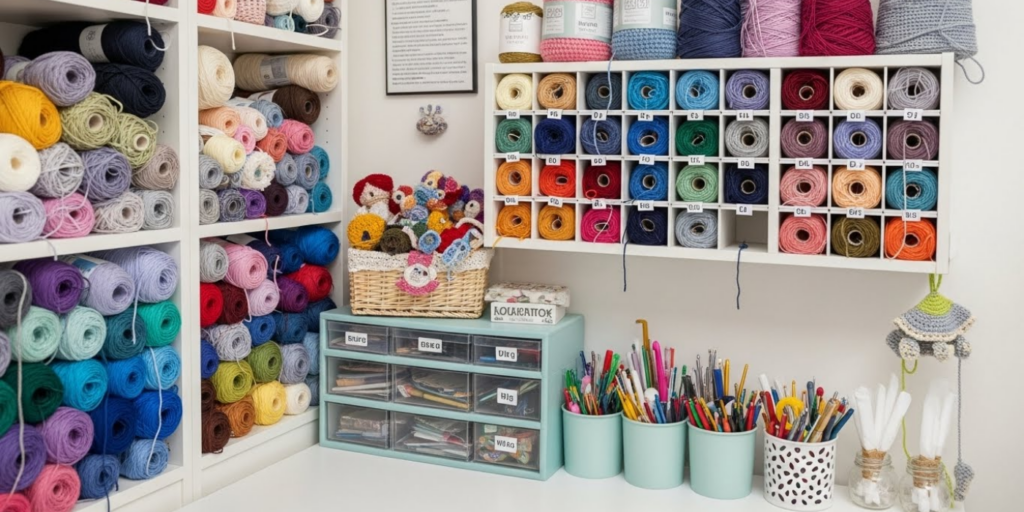
- Storage: Keep yarn in breathable cotton bags, away from sunlight. Separate by weight to avoid confusion.
- Washing: Always follow label instructions. Wool #4 may need hand-wash; acrylic #4 can often machine-wash.
- Blocking: Essential for lace (#0) and fingering (#1) to open stitches. Less critical for bulky weights.
- Joining Yarn: Weave in ends securely, especially in high-wear items like socks (fingering weight) or rugs (jumbo).
- Stash Audit: Once a year, measure WPI of unlabeled yarns and label them with weight numbers.
Monetization Opportunities
Understanding yarn weights opens several revenue streams:
- Educational Content: Sell a “Yarn Weight Cheat Sheet” PDF or host a live workshop.
- Curated Kits: Bundle patterns with perfectly matched yarn (e.g., “First Sweater Kit: DK Weight Edition”).
- Consulting: Help indie dyers label their hand-dyed bases correctly by weight.
- Subscription Boxes: Offer monthly boxes themed by weight (e.g., “Bulky Month: Cozy Home Decor”).
- Affiliate Marketing: Recommend specific yarns by weight in blog posts with tracked links.
Importantly, these opportunities stem from genuine expertise—not hype. Customers pay for clarity and reliability.
Frequently Asked Questions (FAQ)
What does yarn weight actually mean?
Yarn weight refers to the thickness of the yarn strand, not the physical weight of the skein. It’s standardized by the Craft Yarn Council into categories from 0 (lace) to 7 (jumbo), which determine suitable needle/hook sizes and project types.
Can I substitute one yarn weight for another?
Yes, but only if you re-swatch and adjust your pattern accordingly. Substituting a lighter weight for a heavier one will result in a smaller, looser item; the reverse creates a larger, denser piece. Always check gauge.
How do I know what weight my mystery yarn is?
Use the wraps per inch (WPI) method: wrap the yarn snugly around a ruler for one inch and count the wraps. Compare to standard WPI ranges (e.g., 9–11 WPI = worsted/#4).
Why does my finished item look different from the pattern photo?
The most common cause is using a different yarn weight or fiber than specified. Even within the same weight category, fiber content affects drape and stitch definition. Always swatch with your chosen yarn.
Is worsted weight the same as DK?
No. Worsted is #4 (medium), while DK (double knitting) is #3 (light). DK is slightly thinner and typically knits to 22–24 stitches per 4 inches, versus 16–20 for worsted.
What yarn weight is best for beginners?
Worsted-weight (#4) yarn is ideal for beginners because it’s easy to see stitches, widely available, and works up quickly. Use a smooth, light-colored acrylic or wool blend for best results.
Conclusion
Mastering yarn weights transforms you from a casual crafter into a confident creator—and, if you’re running a handmade business, into a trusted expert. It’s the silent foundation behind every successful project, every happy customer, and every five-star review. By understanding the standardized system, reading labels critically, swatching diligently, and respecting fiber behavior, you eliminate guesswork and unlock precision in your work.
Whether you’re making a gift for a loved one or building a sustainable creative business, yarn weight knowledge is your secret weapon. Start applying these principles today: organize your stash by weight, label mystery yarns with WPI, and always—always—swatch before committing to a big project. Your future self (and your customers) will thank you.
Now grab that ball of yarn, check its weight symbol, and create with confidence.

Emily Parker is a passionate crochet artist and creative storyteller. With years of experience turning simple yarn into beautiful, unique pieces, she loves sharing tips, tutorials, and inspiration with fellow crafters. Emily believes that crochet is more than a hobby it’s a way to express creativity, spread joy, and connect with people through handmade art.


