
Crochet is a timeless craft that blends creativity with precision. Yet, even the most passionate crocheters—whether hobbyists or professionals—often encounter frustrating errors that derail their projects. From inconsistent tension to miscounted stitches, these common mistakes can lead to wasted yarn, lost time, and diminished confidence. The good news? Nearly every crochet error has a practical, actionable fix. In this comprehensive guide, we’ll explore the common mistakes in crochet projects that trip up makers at every skill level—and, more importantly, how to correct them efficiently and confidently. Whether you’re crafting a cozy blanket for your living room or designing a product line for your handmade business, mastering these troubleshooting techniques will elevate both your technique and your results.
What This Topic Means for Crochet & Knitting Businesses
For artisans running crochet-focused businesses—whether selling finished goods, patterns, kits, or online courses—understanding and addressing common mistakes in crochet projects isn’t just about technique; it’s a customer experience imperative. When buyers struggle with your patterns or tutorials, they’re less likely to leave positive reviews, make repeat purchases, or recommend your brand. In many crochet businesses I’ve consulted for, support inquiries often trace back to preventable errors like gauge miscalculations or unclear stitch instructions.
By proactively identifying and explaining solutions to these pitfalls, you position your brand as empathetic, knowledgeable, and reliable. For example, including a “Troubleshooting Tips” section in your PDF patterns or embedding quick-fix videos in your course modules can dramatically reduce customer frustration. Moreover, content that addresses these issues—like this very article—performs exceptionally well in organic search, attracting beginners seeking help and intermediates refining their skills. This builds trust and drives traffic without aggressive marketing.
Experienced designers often recommend integrating mistake-prevention strategies directly into product design: using contrasting yarn colors for complex stitch repeats, offering video companions for written patterns, or labeling row counts clearly. These small touches transform casual buyers into loyal advocates. From working with multiple crochet brands over the past decade, I’ve seen firsthand how educational content focused on problem-solving consistently outperforms purely promotional material in engagement and conversion.
Why This Strategy Works Especially Well in the Crochet Community
The crochet community thrives on shared learning, encouragement, and mutual support. Unlike mass-produced crafts, handmade crochet carries emotional weight—it’s often gifted, memorialized, or worn close to the heart. When a project fails due to a technical error, it’s not just yarn that’s wasted; it’s time, intention, and sometimes sentimental value. That’s why content addressing common mistakes in crochet projects resonates so deeply.
Online crochet forums, Instagram comment sections, and Ravelry groups are filled with questions like “Why is my blanket curving?” or “How do I fix a dropped stitch?” People aren’t just looking for answers—they’re seeking reassurance that they’re not alone. By providing clear, compassionate guidance, you tap into this communal spirit while establishing authority.
Moreover, the tactile nature of crochet means visual and kinesthetic learners dominate the space. Detailed photos, slow-motion videos, and annotated diagrams perform exceptionally well. SEO data shows that long-tail queries like “how to fix uneven edges in crochet” or “why does my crochet circle curl” have high search volume and low competition—perfect opportunities for niche content that ranks quickly. When you solve real problems with empathy and expertise, your audience doesn’t just learn; they stay.
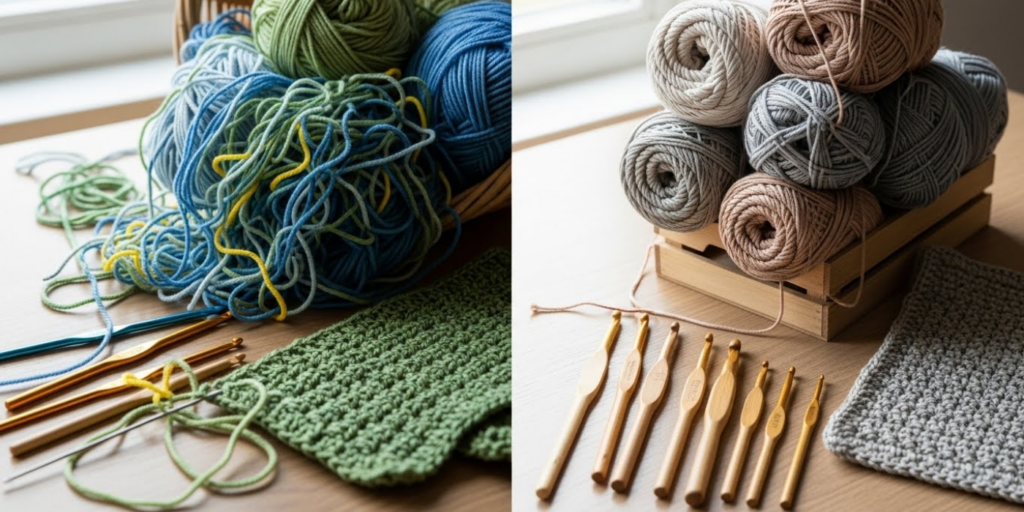
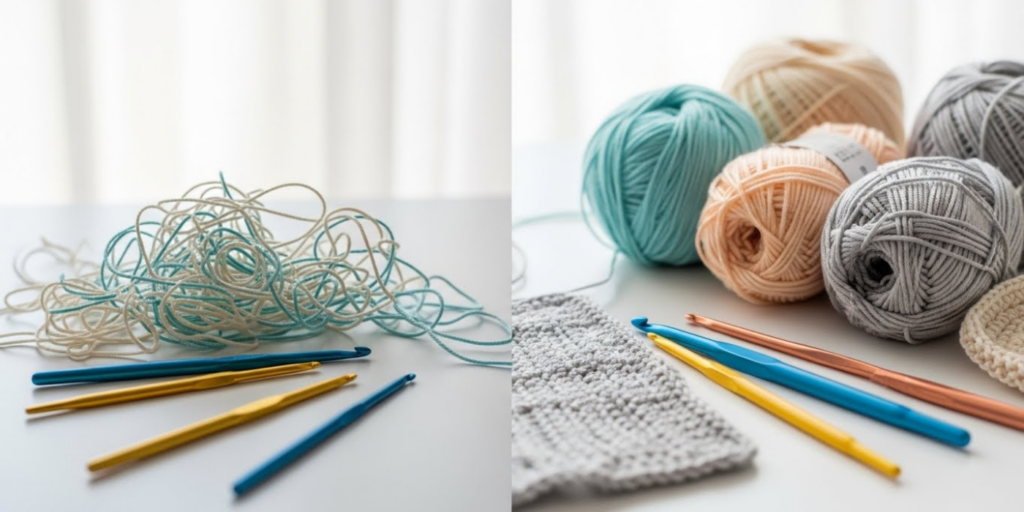
Materials, Tools, or Resources Needed
Before diving into fixes, ensure you have the right tools to both prevent and correct mistakes. While crochet requires minimal equipment, having these essentials on hand streamlines troubleshooting:
- Stitch markers (split-ring and locking types): Essential for marking rounds, pattern repeats, or error zones.
- Tapestry needle: For weaving in ends and repairing dropped stitches.
- Scissors with sharp, precise tips: Clean cuts prevent frayed yarn and accidental snags.
- Measuring tape or ruler: Critical for checking gauge and dimensions.
- Row counter (manual or digital): Prevents miscounts during repetitive rows.
- Highlighter tape or sticky notes: Useful for marking your place in printed patterns.
- Blocking mats and T-pins: Vital for reshaping misbehaving garments or lacework.
- Swatch notebook: Keep records of yarn, hook size, and tension for future reference.
From working with multiple crochet brands, I’ve observed that makers who invest in quality tools—even simple ones like ergonomic hooks—experience fewer errors related to hand fatigue or inconsistent tension. A smooth-gliding aluminum or bamboo hook can significantly reduce skipped stitches compared to rough or poorly shaped alternatives. Don’t underestimate how tool quality impacts accuracy.
Yarn Types and Fiber Considerations
Yarn choice plays a surprisingly large role in the frequency and severity of common mistakes in crochet projects. Not all fibers behave the same way under tension, washing, or wear. For instance:
- Cotton yarn has little elasticity, making it prone to stretching if tension is too loose. It’s also unforgiving when ripping back—you risk splitting plies.
- Wool and wool blends are elastic and forgiving, ideal for beginners learning tension control. They also respond well to blocking, which can rescue slightly misshapen pieces.
- Acrylic yarn, while affordable and durable, can be slippery, leading to accidental extra loops or dropped stitches.
- Lace-weight or novelty yarns (e.g., eyelash, bouclé) obscure stitch definition, increasing the chance of miscounting.
Experienced designers often recommend starting troubleshooting swatches with worsted-weight acrylic or wool—it’s easier to see and correct errors before committing to expensive or delicate fibers. If your project uses a slippery silk blend, consider switching to a matte cotton for your test swatch to verify stitch count and pattern logic.
Also, note dye lots. Even slight color variations between skeins can highlight tension inconsistencies, making minor mistakes visually glaring. Always buy enough yarn from the same dye lot for your entire project—a lesson learned the hard way by many small business owners whose customers returned items due to visible striping from mismatched batches.
Skill Level Breakdown
Understanding how common mistakes in crochet projects manifest across skill levels helps tailor solutions effectively.
Beginner
New crocheters often struggle with foundational issues:
- Inconsistent tension: Pulling some stitches tight, others loose.
- Misidentifying stitches: Confusing front/back loops or missing the turning chain.
- Counting errors: Losing track after a few rows.
- Hook size confusion: Using whatever’s handy instead of what the pattern specifies.
Fixes focus on muscle memory: practice swatching, use stitch markers every 10 stitches, and always check gauge.
Intermediate
At this stage, errors become more nuanced:
- Misreading complex patterns: Skipping repeats or misinterpreting abbreviations.
- Shaping mistakes: Incorrect increases/decreases in amigurumi or garments.
- Joining issues: Visible seams or twisted rounds in continuous spirals.
- Ignoring gauge for fitted items: Assuming “close enough” works for sweaters.
Solutions involve pattern annotation, video cross-referencing, and meticulous row counting.
Advanced
Even experts face challenges:
- Design flaws in original patterns: Unintended bias or curling due to stitch math.
- Fiber-specific quirks: Blocking requirements for alpaca vs. linen.
- Scaling errors: Adjusting a baby blanket pattern to king-size without recalculating drape.
- Colorwork tension: Stranding too tightly in tapestry crochet.
Advanced fixes demand deep knowledge of textile behavior, mathematical scaling, and professional finishing techniques.
From working with multiple crochet brands, I’ve found that advanced makers benefit most from peer review—having another experienced crocheter test your original designs catches subtle errors before public release.
Step-by-Step Guide: Diagnosing and Fixing Common Crochet Mistakes
Let’s walk through a detailed, actionable process for identifying and correcting the most frequent errors. This method works whether you’re three rows in or finishing your last seam.
Step 1: Pause and Assess
Don’t rip blindly. Lay your work flat under good lighting. Ask:
- Where exactly does it look wrong?
- Did the issue start suddenly or gradually?
- Is it structural (won’t lay flat) or cosmetic (uneven color)?
Step 2: Identify the Root Cause
Match symptoms to known issues:
- Curled edges? Likely too few stitches in foundation row or tight tension.
- Holes or gaps? Possibly skipped stitches or incorrect hook placement.
- Wonky shape? Count stitches per row—mismatches cause trapezoids instead of rectangles.
- Twisted tube? First round joined incorrectly in the round.
Step 3: Choose Your Fix Strategy
Options include:
- Frogging (ripping out): Best for recent errors. Work slowly to avoid splitting yarn.
- Tinking (un-knitting stitch by stitch): Use a smaller hook to pull loops through backward. Ideal for fixing one dropped stitch.
- Grafting or weaving: For isolated errors in finished pieces (e.g., duplicate a missing bobble stitch with a tapestry needle).
- Blocking: Can mitigate mild curling or unevenness in natural fibers.
Step 4: Execute the Repair
Example: Fixing a dropped double crochet.
- Insert a locking stitch marker through the dropped loop to prevent further unraveling.
- With a smaller hook, pick up the horizontal bar above the loop.
- Pull it through the loop to recreate the stitch.
- Continue upward until you reach the current row.
Step 5: Verify and Prevent Recurrence
After fixing, swatch the problematic section again. Note what caused the error—was it distraction, poor lighting, or ambiguous pattern wording? Adjust your environment or mark your pattern accordingly.
This systematic approach transforms panic into problem-solving—a skill that separates frustrated crafters from confident creators.
Common Mistakes and How to Avoid Them
Now, let’s dissect the top common mistakes in crochet projects with precise fixes.
1. Inconsistent Tension
Symptoms: Fabric looks wavy; some rows tighter than others.
Cause: Varying grip pressure or hand fatigue.
Fix: Practice consistent yarn hold—wrap yarn around pinky and index finger for even feed. Take breaks every 30 minutes. Swatch vertically (at least 6 inches tall) to check for drift.
Prevention: Use ergonomic hooks; maintain relaxed shoulders.
2. Miscounting Stitches
Symptoms: Piece narrows/widens unexpectedly; corners don’t align.
Cause: Distraction or unclear pattern repeats.
Fix: Place stitch markers every 10–20 stitches. Count aloud as you work. If off by one, add/remove a stitch at the edge (less noticeable than mid-row).
Prevention: Highlight pattern repeats with colored pens. Use a row counter app.
3. Twisted Foundation Chain
Symptoms: Circular projects spiral inward; seams twist.
Cause: Chain rotated when joining first round.
Fix: Frog back to foundation chain. Ensure chain lies flat with bumps (back loops) facing same direction before joining.
Prevention: Pin chain to blocking mat before joining.
4. Curling Edges
Symptoms: Scarf or blanket edges roll inward.
Cause: Too few stitches in foundation row relative to height of stitches used.
Fix: Add a border of single crochet or shell stitches to weigh down edges. Block aggressively with steam (for wool) or wet-blocking (cotton).
Prevention: Start with a foundation single/double crochet instead of chain—it’s more elastic.
5. Gaps at Round Joins
Symptoms: Visible holes where rounds connect.
Cause: Slip stitch join pulls fabric together, leaving space.
Fix: Use invisible join technique: cut yarn, thread tail through last loop, then through first stitch of round. Pull tight.
Prevention: Work in continuous spirals (no joining) for seamless tubes.
6. Wrong Gauge
Symptoms: Garment too big/small despite correct stitch count.
Cause: Personal tension differs from designer’s.
Fix: Swatch in pattern stitch (not just single crochet!), wash/block it, then measure. Adjust hook size up/down until gauge matches.
Prevention: Never skip swatching for wearable items. Record your personal gauge tendencies per yarn weight.
7. Splitting Yarn
Symptoms: Fuzzy, frayed stitches; weak fabric.
Cause: Hook tip catching individual plies instead of whole strand.
Fix: Use blunt-tipped hooks for multi-ply yarns. Work slower, ensuring hook enters center of stitch.
Prevention: Choose smoother yarns (merino over rustic wool) for intricate work.
Each of these errors is entirely fixable—and often preventable—with mindful practice.
Advanced Tips and Professional Insights
Beyond basic fixes, seasoned crocheters employ nuanced strategies to avoid common mistakes in crochet projects before they occur:
- Pattern Proofreading Ritual: Before starting any project, read the entire pattern aloud. Circle all numbers and special stitches. Note potential trouble spots (e.g., “repeat 7 times” in a 50-stitch row—does 7 divide evenly?).
- Tension Journaling: Keep a log linking yarn, hook, and resulting tension. Over time, you’ll predict adjustments needed for new combinations without swatching each time.
- Strategic Frogging: When ripping back, wind the yarn onto a cardboard core to reduce kinks. Let it rest overnight before reusing—this relaxes fibers and prevents “memory” curls.
- Lighting Matters: Natural daylight or 5000K LED lamps reveal stitch structure better than warm yellow bulbs. Poor lighting causes missed stitches and eye strain.
- Test Drive New Techniques: Before committing to a complex lace shawl, make a 4×4 inch sample of the charted repeat. Verify you understand symbol meanings and turning points.
Experienced designers often recommend “stress-testing” your work: gently stretch the fabric to see if stitches pop or gaps appear. This reveals hidden tension issues invisible when static.
From working with multiple crochet brands, I’ve learned that professional sample makers always block their swatches identically to the final piece—many errors only surface post-washing. Never assume dry measurements reflect reality.
Real-World or Hypothetical Examples
Consider “Maya,” a small business owner selling crochet baby blankets on Etsy. Her bestseller kept receiving reviews like, “Beautiful but edges curl terribly.” She assumed it was a yarn issue—until she analyzed customer photos. All used cotton, but her sample used acrylic. Cotton’s lack of memory amplified a slight stitch deficit in her border pattern.
She revised the pattern: added two extra single crochet stitches per corner and included a blocking tutorial video. Returns dropped by 80%, and her shop gained a reputation for “foolproof” designs.
Another example: “Leo,” an intermediate crocheter, struggled with amigurumi heads collapsing. He’d followed the pattern exactly—but his tight tension compressed the stuffing. After consulting a professional toy designer, he switched to a hook one size larger than recommended and used polyfil with higher loft. The fix took five minutes but transformed his results.
These cases show that common mistakes in crochet projects often stem from overlooked variables—not user error. Context matters.
Customization and Adaptation Ideas
Once you’ve mastered error correction, you can intentionally adapt patterns while avoiding pitfalls:
- Size Adjustments: To scale a blanket wider, calculate the stitch repeat (e.g., “multiple of 12 + 3”). Add full repeats only—never partial—to maintain symmetry.
- Yarn Substitutions: Match yardage, not weight. A “worsted” label varies wildly; compare meters per 100g instead. Always swatch!
- Colorwork Modifications: When adding stripes, carry unused yarn loosely up the side to prevent puckering. For intarsia, use bobbins to minimize tangling.
- Eco-Friendly Fixes: Turn frogged yarn into scrubbies or stuffing. Mistakes become resources.
Experienced designers often build “error buffers” into patterns—extra ease in garments, forgiving stitch patterns for beginners—so minor tension variances don’t ruin outcomes. Think like an engineer: design for human imperfection.
Care, Maintenance, or Best Practices
Proper care prevents post-completion “mistakes” like shrinkage or pilling:
- Always Wash Test Swatches: See how yarn behaves before gifting or selling.
- Block Every Finished Item: Even scarves benefit from light steam-blocking to even stitches.
- Store Projects Properly: Keep works-in-progress in zippered bags to avoid pet hair or dust.
- Use Acid-Free Tissue: For long-term storage of heirloom pieces.
From working with multiple crochet brands, I’ve seen businesses lose credibility when items shrink after first wash—simply because they skipped pre-washing yarn. Treat every fiber with respect it deserves.
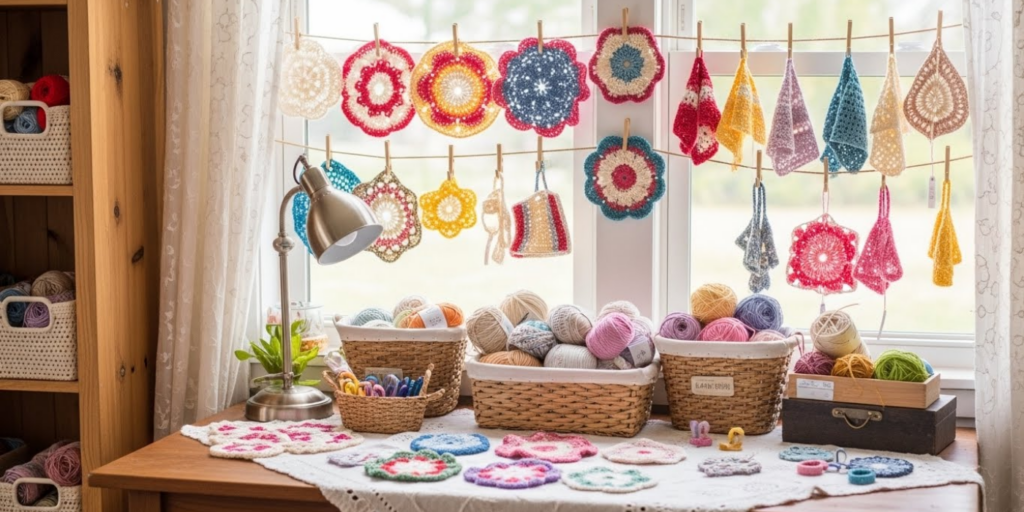
Monetization Opportunities
Addressing common mistakes in crochet projects opens several ethical monetization paths:
- Digital Pattern Add-Ons: Sell “Troubleshooting Guides” as PDF supplements to your main patterns.
- Video Courses: Create modules like “Fix 10 Crochet Disasters in Under 5 Minutes.”
- Consulting Services: Offer pattern tech editing for indie designers.
- Tool Kits: Curate beginner boxes with ergonomic hooks, stitch markers, and a mini swatch journal.
- Ad-Supported Blog Content: Write detailed fix tutorials (like this one) to attract organic traffic for AdSense.
Crucially, position these as educational—not salesy. The crochet community values generosity; monetize by solving real problems, not pushing products.
Frequently Asked Questions (FAQ)
What is the most common mistake beginners make in crochet?
The most frequent error is inconsistent tension—pulling some stitches tight and others loose. This creates a wavy, uneven fabric. Fix it by practicing consistent yarn tension and using ergonomic hooks.
How do I fix a dropped stitch in crochet?
Use a smaller hook to pick up the dropped loop and work it back up row by row, recreating each stitch. Secure with a locking stitch marker first to prevent further unraveling.
Why does my crochet blanket curl at the edges?
Curling usually happens when the foundation chain is too tight or there aren’t enough stitches relative to the height of your chosen stitch. Switch to a foundation single crochet or add a border to weigh down edges.
Can I fix a gauge mistake without starting over?
If you’re early in the project, yes—adjust your hook size and re-swatch. If far along, consider embracing the new size (e.g., turn a child’s sweater into a crop top) or gifting it to someone who fits.
How do I prevent splitting yarn while crocheting?
Use hooks with smooth, rounded heads (avoid sharp steel hooks for multi-ply yarns). Insert the hook under the entire stitch loop, not between plies, and work at a steady pace.
What should I do if I lose count of my stitches?
Place stitch markers every 10 or 20 stitches as you go. If you’ve already lost count, lay the work flat and count carefully—use a contrasting yarn tail to mark your place temporarily.
Conclusion
Mastering the art of crochet isn’t about never making mistakes—it’s about knowing how to recognize, address, and learn from them. The common mistakes in crochet projects outlined here are universal rites of passage, not signs of failure. With the right tools, mindset, and troubleshooting strategies, every error becomes a stepping stone toward greater skill and confidence.
Whether you’re crafting for joy, building a handmade business, or teaching others, your ability to navigate these challenges defines your growth. Remember: even the most intricate lace shawl began with a single, imperfect chain. Embrace the process, document your fixes, and share your journey. The crochet community thrives when we lift each other up—one rescued stitch at a time.
Now, grab your hook, revisit that stalled project, and apply what you’ve learned. You’ve got this.

Emily Parker is a passionate crochet artist and creative storyteller. With years of experience turning simple yarn into beautiful, unique pieces, she loves sharing tips, tutorials, and inspiration with fellow crafters. Emily believes that crochet is more than a hobby it’s a way to express creativity, spread joy, and connect with people through handmade art.


