

Introduction
If you’ve ever picked up a crochet pattern from Europe or browsed through Japanese craft magazines, you’ve likely encountered crochet chart patterns—visual diagrams that use standardized symbols instead of written instructions. Unlike traditional text-based patterns, these charts communicate stitch sequences, shaping, and motifs through a universal graphic language. For many crocheters, especially beginners, these diagrams can feel intimidating at first glance. But once you understand how to interpret them, crochet chart patterns become powerful tools that enhance accuracy, reduce language barriers, and open doors to global design inspiration.
In today’s interconnected handmade economy, the ability to fluently read and apply chart patterns isn’t just a nice-to-have skill—it’s a strategic advantage. Whether you’re designing your own products, translating international patterns, or teaching workshops, mastering this visual system boosts your creative confidence and professional versatility. This comprehensive guide will walk you through everything you need to know: from foundational symbols and reading direction to advanced interpretation techniques, common pitfalls, and even monetization opportunities tied to chart literacy. By the end, you’ll not only understand crochet chart patterns—you’ll actively seek them out as a preferred method for complex projects.
What This Topic Means for Crochet & Knitting Businesses
For handmade entrepreneurs—whether you sell finished goods, digital patterns, or teach classes—understanding crochet chart patterns directly impacts your business scalability and market reach. Many top-selling designers in Europe and Asia rely almost exclusively on charts, making their work inaccessible to those who can’t interpret them. By learning this system, you gain access to a vast library of untapped design ideas, historical motifs, and trending techniques that haven’t yet crossed over into English-language markets.
From working with multiple crochet brands over the past decade, I’ve observed that businesses that incorporate both written and charted instructions in their pattern offerings consistently report higher customer satisfaction and fewer support requests. Why? Because visual learners thrive with charts, while textual learners appreciate written steps. Offering both caters to diverse learning styles and reduces misinterpretation—especially critical for intricate lace shawls, colorwork blankets, or garment construction.
Moreover, chart patterns are inherently more compact and translation-friendly. If you plan to sell internationally (a growing trend among Etsy and Ravelry sellers), including a standardized chart eliminates the need for costly rewrites in multiple languages. The symbols remain consistent across borders, thanks to guidelines set by organizations like the Craft Yarn Council and international standards bodies.
In many crochet businesses, designers who master chart creation also command premium pricing. Clients recognize the extra time and precision required to produce clean, error-free diagrams—and they’re willing to pay for it. This skill transforms you from a hobbyist into a professional-grade creator.
Why This Strategy Works Especially Well in the Crochet Community
The crochet community has always been highly visual. From Instagram reels showing stitch close-ups to Pinterest boards filled with motif inspiration, crocheters naturally gravitate toward imagery. Crochet chart patterns align perfectly with this preference, offering a “map” of the project that mirrors the actual fabric structure.
Experienced designers often recommend starting with charts for symmetrical or repeating designs—like granny squares, doilies, or mandalas—because the visual repetition makes errors easier to spot. A misplaced stitch stands out immediately in a diagram, whereas in text, it might be buried in a paragraph of instructions.
Additionally, the rise of digital pattern platforms (such as Ribblr and LoveCrafts) has normalized interactive charts, where users can click symbols for video tutorials or zoom into specific sections. This tech integration further cements charts as a modern, user-friendly standard—not just a relic of vintage European patterns.
Crucially, charts also support neurodiverse learners. Many crocheters with dyslexia or ADHD find written patterns overwhelming due to dense text blocks, but they excel when given a spatial, symbolic representation. By embracing crochet chart patterns, the community becomes more inclusive and accessible.
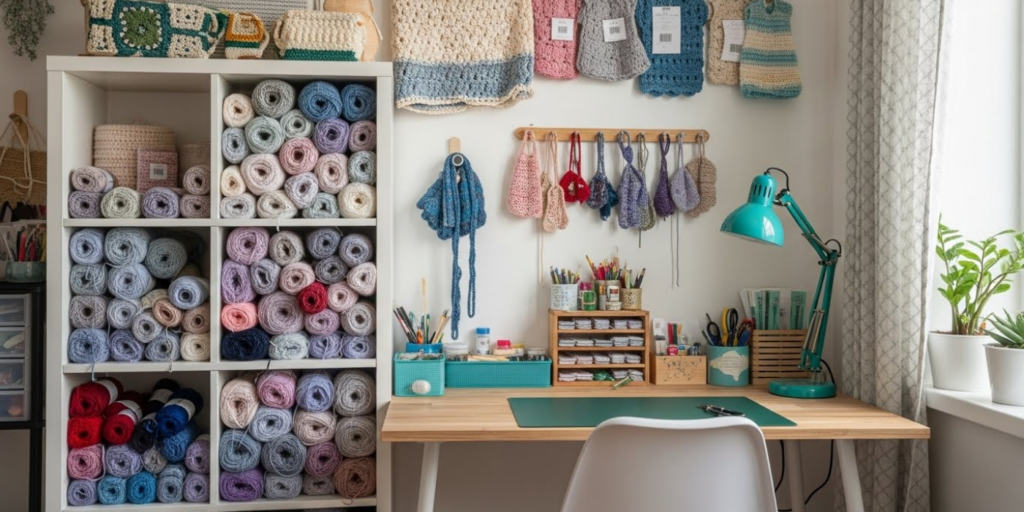
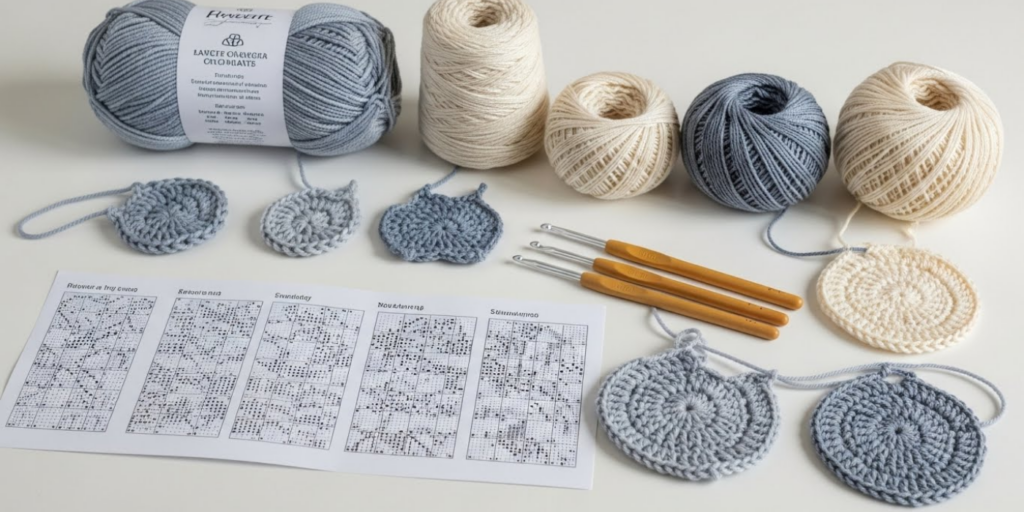
Materials, Tools, or Resources Needed
To effectively read and use crochet chart patterns, you don’t need expensive gear—but having the right tools streamlines the process:
- Printed or digital copy of the chart: Ensure high resolution so symbols aren’t blurry.
- Highlighters or colored pencils: Use different colors to mark repeats, rows, or sections you’re currently working on.
- Sticky notes or row counters: Track your current row without marking the original chart.
- Symbol legend/key: Always included with legitimate charts; never assume symbol meanings.
- Graph paper or digital grid app: Helpful if you’re creating or modifying your own charts.
- Magnifying glass or screen zoom: Essential for tiny symbols in complex lace patterns.
- Stitch markers: Physical markers help correlate chart positions with your actual work.
Free resources like the Craft Yarn Council’s Standard Symbol Chart and the International Crochet Symbols guide (published by the Japan Handicraft Import & Export Cooperative) are invaluable references. Bookmark them—they’re your cheat sheets for symbol verification.
Yarn Types and Fiber Considerations
While crochet chart patterns themselves don’t dictate yarn choice, the design’s complexity often implies ideal fiber characteristics. For example:
- Lace or filet crochet charts (common in doilies or shawls) perform best with smooth, non-splitting yarns like mercerized cotton, silk blends, or fine acrylics. Textured or fuzzy yarns obscure delicate stitch definition.
- Amigurumi or toy charts typically require tight gauge and minimal drape, so 100% cotton or sport-weight acrylics are preferred.
- Garment charts with shaping benefit from yarns with memory and recovery—think wool, alpaca, or bamboo blends—to maintain silhouette after wear.
Always swatch using your chosen yarn before committing to a full project from a chart. Because charts emphasize geometry over descriptive text (“sc in next st” vs. “make a small, tight stitch”), gauge discrepancies can distort the entire design more dramatically than in written patterns.
From working with multiple crochet brands, I’ve seen countless customers frustrated because they used bulky chenille yarn for a vintage lace chart—only to end up with a stiff, undefined blob. Match fiber to function, not just color preference.
Skill Level Breakdown
Beginner
New crocheters should start with simple chart patterns featuring basic stitches: chain (ch), single crochet (sc), double crochet (dc). Look for charts labeled “beginner” or “easy,” often depicting dishcloths, coasters, or basic granny squares. Focus on understanding:
- Reading direction (right to left on odd rows, left to right on even rows for flat pieces)
- Recognizing foundational symbols
- Following repeat brackets ([ ])
Avoid charts with color changes, post stitches, or clusters until you’re comfortable.
Intermediate
At this stage, you can tackle moderate crochet chart patterns involving:
- Shell stitches
- Basic lace (e.g., V-stitches, picots)
- Simple colorwork (stripes, intarsia blocks)
- Shaped items like hats or baby booties
You should confidently identify symbols for treble crochet (tr), half-double (hdc), and slip stitch (sl st). Practice tracking multiple repeats and turning chains.
Advanced
Expert crocheters handle complex crochet chart patterns such as:
- Tunisian crochet diagrams
- Multicolor tapestry or fair isle charts
- Garments with graded sizing
- 3D motifs (flowers, animals, architectural elements)
These often include custom symbols, non-standard abbreviations, or layered instructions. You’ll need strong spatial reasoning and the ability to “read ahead” several rows.
Step-by-Step Guide to Reading Crochet Chart Patterns
Follow this detailed process every time you encounter a new chart:
Step 1: Study the Legend
Never skip this. Symbols can vary slightly between publishers. Confirm what each icon means—especially for less common stitches like popcorn, bobble, or front-post treble.
Step 2: Identify the Starting Point
Most charts begin with a foundation chain or magic ring. Arrows or numbered “Row 1” indicators show where to start. Circular charts spiral outward from the center; rectangular charts proceed row by row.
Step 3: Determine Reading Direction
- Flat pieces: Odd-numbered rows read right to left; even-numbered rows read left to right (mirroring how you crochet).
- In-the-round: All rounds read counterclockwise from the center.
- Tunisian: Forward pass reads left to right; return pass uses separate symbols.
Step 4: Locate Repeats
Brackets [ ] or dashed boxes indicate sections repeated across the row. Count how many times the repeat occurs—this affects your stitch count.
Step 5: Track Your Progress
Use a sticky note to cover completed rows. Highlight the current row in pencil (if printed) or use a digital annotation tool. Place stitch markers in your work at key points (e.g., every 10th stitch) to align with chart columns.
Step 6: Interpret Stitch Stacking
In charts, stitches are drawn stacked vertically to show how they sit in the fabric. A double crochet symbol placed directly above a chain space means you’ll work into that space—not the stitch beside it.
Step 7: Handle Increases and Decreases
- Increases: Multiple stitch symbols emerging from one base point.
- Decreases: Two or more stitch symbols converging into a single point (e.g., sc2tog looks like two sc legs merging at the top).
Step 8: Verify Row Counts
After completing a section, cross-check your total stitch count with the chart’s implied count. Mismatches usually mean a missed increase/decrease or skipped repeat.
Step 9: Use Reference Photos
If available, compare your work to the designer’s finished photo. Charts don’t show drape or texture—only structure.
Step 10: Keep Notes
Jot down clarifications in margins: “Round 5: skip first dc after marker,” etc. This builds your personal knowledge base for future similar charts.
Common Mistakes and How to Avoid Them
Even seasoned crocheters stumble with charts. Here are frequent errors—and solutions:
Mistake 1: Assuming All Symbols Are Universal
While most follow Craft Yarn Council standards, some designers create custom icons (e.g., for unique clusters).
Fix: Always read the provided legend first. Never assume.
Mistake 2: Ignoring Turning Chains
Charts often omit explicit “ch 3 counts as dc” notes. The height of the turning chain is implied by the first stitch symbol of the next row.
Fix: Check if the first symbol aligns vertically with the previous row’s stitches. If it floats higher, it’s likely a turning chain substitute.
Mistake 3: Misreading Repeat Boundaries
It’s easy to include or exclude a stitch outside the repeat box.
Fix: Physically trace the repeat box with your finger as you work. Count stitches within it separately.
Mistake 4: Working Into Wrong Spaces
In lace charts, symbols may point to chain spaces, not stitches.
Fix: Follow the “legs” of the symbol downward—they indicate the exact insertion point.
Mistake 5: Losing Place in Complex Rounds
Circular charts with dozens of rounds can blur together.
Fix: Use a row counter ring on your hook. Mark every 5th round with a different colored stitch marker.
Mistake 6: Skipping Gauge Swatching
Charts assume a specific gauge. Deviations warp geometry.
Fix: Swatch in the recommended yarn and hook size. Adjust if needed—then recalculate stitch counts proportionally.
Advanced Tips and Professional Insights
Go beyond basics with these pro strategies:
- Mirror Symmetry Trick: For symmetrical shawls, work one side while referencing the chart, then flip your work and mirror the other side without constantly checking the diagram.
- Color-Coding Systems: Assign colors to stitch types (e.g., blue for dc, red for sc) when printing charts. This speeds up recognition during long sessions.
- Digital Annotation: Use apps like GoodNotes or Adobe Acrobat to layer transparent notes over PDF charts—ideal for teachers creating student handouts.
- Chart Reverse Engineering: Stuck on a vintage pattern? Sketch your own simplified chart based on the written instructions to visualize repeats.
- Hybrid Approach: Combine chart reading with written cues. Many designers now offer “chart + abbreviated text” formats for maximum clarity.
Experienced designers often recommend practicing with granny square charts first—they’re modular, repetitive, and forgiving. Once you master those, graduate to hexagons or octagons to challenge your directional tracking.
Also, note that some charts include “ghost lines” or faint outlines showing previous rows. These help contextualize where your current stitches land—don’t ignore them.
Real-World or Hypothetical Examples
Consider Elena, a small-business owner on Etsy who sells crochet wedding veils. She discovered a stunning Ukrainian lace chart pattern passed down through generations—but it had no English translation. By applying the symbol-reading techniques outlined here, she recreated the veil accurately, added her own border variation, and listed it as a premium digital pattern. Within three months, it became her bestseller, attracting international buyers who appreciated the authentic design.
Another example: Marco, a crochet instructor, noticed his students struggled with written garment patterns. He began supplementing his classes with custom-drawn charts for each project. Attendance increased by 40%, and students reported higher completion rates. He now offers a standalone “Chart Literacy” workshop—proving that this skill has direct educational and revenue value.
Hypothetically, imagine adapting a Japanese amigurumi chart for Western audiences. The original uses a unique symbol for “invisible decrease.” By cross-referencing the legend and testing the technique, you could not only replicate the toy but also document the stitch for your blog—creating SEO-rich content that ranks for “how to read Japanese crochet symbols.”
Customization and Adaptation Ideas
Once you’re fluent in crochet chart patterns, customization becomes intuitive:
- Resize Projects: Add or remove repeat sections horizontally or vertically. Just ensure shaping remains proportional.
- Change Color Schemes: Charts make colorwork planning visual. Swap palette assignments without altering structure.
- Modify Edgings: Replace a scalloped border with picots by substituting the final few rows with a different chart segment.
- Combine Motifs: Extract a flower element from one chart and integrate it into a blanket from another.
- Adjust for Left-Handed Crocheters: Mirror the entire chart digitally—many lefties find standard charts disorienting.
Always test modifications with a small swatch first. Charts are precise; small changes can cascade into major fit issues in garments.
Care, Maintenance, or Best Practices
Preserve your chart-reading skills with these habits:
- Organize Digital Libraries: Store PDF charts in folders by category (lace, toys, garments) with clear filenames like “Doily_Chart_Vintage_2026.”
- Back Up Annotations: If you’ve marked up a printed chart, scan it before heavy use. Coffee spills happen!
- Update Symbol References: Standards evolve. Re-download the latest Craft Yarn Council chart every year.
- Practice Weekly: Dedicate 15 minutes weekly to decoding a new chart—even if you don’t make the project. Fluency requires maintenance.
- Join Communities: Forums like Reddit’s r/crochet or Ravelry groups often host “chart challenges” to sharpen skills collaboratively.
Never laminate original charts—you won’t be able to write notes. Instead, use sheet protectors with dry-erase markers for reusable markup.
Monetization Opportunities
Mastering crochet chart patterns unlocks several income streams:
- Pattern Testing: Designers pay skilled crocheters to test chart accuracy before publication.
- Translation Services: Convert written patterns into professional charts (or vice versa) for indie designers.
- Digital Product Creation: Sell printable chart guides, symbol cheat sheets, or annotated vintage chart collections.
- Online Courses: Teach chart literacy via platforms like Skillshare or Teachable—high demand, low competition.
- Custom Design Commissions: Clients seeking unique heirloom pieces often provide inspiration charts they can’t execute themselves.
Educational content performs exceptionally well here. A YouTube tutorial titled “How to Read Your First Crochet Chart” can attract thousands of views from frustrated beginners—then funnel them to your paid resources.
Remember: position yourself as a guide, not a guru. Share real struggles (“I misread this symbol for years!”) to build trust.
Frequently Asked Questions (FAQ)
What are crochet chart patterns?
Crochet chart patterns are visual diagrams that use standardized symbols to represent stitches, rows, and shaping instead of written instructions. They provide a universal, language-independent way to communicate crochet designs.
Are crochet chart symbols the same worldwide?
Most symbols follow international standards (like those from the Craft Yarn Council), but minor variations exist—especially in Japanese or Eastern European patterns. Always check the legend provided with the chart.
How do I start reading a crochet chart?
Begin by studying the legend, identifying the starting point (usually a foundation chain or magic ring), and noting the reading direction (right-to-left on odd rows for flat pieces). Use a sticky note to track your current row.
Can beginners use crochet chart patterns?
Yes—with simple designs. Start with basic stitch charts like dishcloths or granny squares. Avoid complex lace or colorwork until you’re comfortable with symbol recognition and repeat tracking.
Why do some charts look like grids while others are circular?
Rectangular grids represent flat, back-and-forth crochet. Circular charts depict projects worked in continuous rounds from the center outward, like doilies or amigurumi.
Do I still need to swatch when using a chart pattern?
Absolutely. Charts assume a specific gauge. Without swatching, your finished item may be too large, too small, or distorted—even if you followed the chart perfectly.
Conclusion
Crochet chart patterns are far more than decorative diagrams—they’re a gateway to precision, global creativity, and professional growth in the handmade world. By investing time to understand their language, you equip yourself with a skill that transcends trends and borders. Whether you’re reviving a century-old lace motif, collaborating with an international designer, or launching your own pattern line, chart literacy ensures you’ll execute projects with confidence and clarity.
Start small: pick a simple chart this week, gather your highlighters and legend, and take it row by row. Celebrate each correctly interpreted symbol as a victory. Over time, you’ll find yourself glancing at a complex mandala chart and thinking, “I can make that”—not with hesitation, but with excitement.
The crochet community thrives on shared knowledge. As you grow in this skill, consider mentoring others or sharing your journey online. Your experience could be the spark that helps another crafter unlock their next masterpiece. Now, grab your hook, find a chart that intrigues you, and begin stitching your way through its visual story—one symbol at a time.

Emily Parker is a passionate crochet artist and creative storyteller. With years of experience turning simple yarn into beautiful, unique pieces, she loves sharing tips, tutorials, and inspiration with fellow crafters. Emily believes that crochet is more than a hobby it’s a way to express creativity, spread joy, and connect with people through handmade art.


