
Introduction
Overlay crochet is one of the most visually striking and technically fascinating techniques in modern fiber arts. Unlike traditional crochet, which builds fabric row by row using a single hook and yarn, overlay crochet creates intricate, three-dimensional textures by “overlaying” additional stitches or motifs on top of a foundational mesh base. This method produces stunning lace-like effects with depth, shadow, and dimensionality that captivate both makers and wearers alike.
In recent years, overlay crochet has surged in popularity—especially among independent designers, handmade brands, and content creators seeking to differentiate their work in a saturated market. Its architectural quality and sculptural potential make it ideal for statement garments, heirloom shawls, and high-end accessories. But beyond aesthetics, overlay crochet offers strategic advantages for artisans: it’s highly shareable on social media, commands premium pricing, and appeals to discerning customers who value craftsmanship over mass production.
Whether you’re a seasoned crocheter looking to expand your repertoire or a small business owner exploring new product lines, understanding overlay crochet is essential. In this comprehensive guide, you’ll discover not only how to execute the technique with confidence but also how to leverage it creatively and commercially. From foundational materials to advanced design strategies—and even monetization pathways—this article serves as your definitive resource on everything you need to know about overlay crochet.
What This Topic Means for Crochet & Knitting Businesses
For handmade businesses operating in today’s digital-first marketplace, standing out isn’t just desirable—it’s necessary. Overlay crochet presents a compelling opportunity to do exactly that. Unlike basic stitch patterns that flood online marketplaces, overlay crochet pieces are inherently unique, labor-intensive, and visually arresting. These qualities translate directly into higher perceived value, allowing artisans to justify premium pricing without compromising authenticity.
In many crochet businesses I’ve consulted with, introducing overlay crochet collections has led to measurable increases in average order value (AOV) and customer retention. Why? Because overlay crochet items—such as openwork cardigans, sculptural cowls, or geometric shawls—often become signature pieces that define a brand’s identity. Customers don’t just buy a garment; they invest in wearable art with a story.
Moreover, overlay crochet aligns perfectly with current consumer trends: sustainability, slow fashion, and artisanal craftsmanship. The technique typically uses less yarn than solid fabrics due to its open mesh base, reducing material costs while enhancing eco-appeal. And because each piece requires significant time and skill, it naturally discourages fast-fashion consumption—a selling point increasingly valued by conscious buyers.
From a marketing standpoint, overlay crochet is exceptionally photogenic. The interplay of light and shadow across its textured surfaces performs exceptionally well on Instagram, Pinterest, and TikTok. Experienced designers often recommend creating behind-the-scenes reels showing the layering process—these not only educate followers but also build trust by demonstrating the handcrafted effort involved.
Ultimately, mastering overlay crochet isn’t just about learning a new stitch—it’s about positioning your brand at the intersection of artistry, innovation, and market demand.
Why This Strategy Works Especially Well in the Crochet Community
The crochet community has always thrived on innovation, collaboration, and visual storytelling—and overlay crochet taps into all three. Unlike knitting, which often emphasizes drape and uniformity, crochet excels at structure, texture, and dimensional manipulation. Overlay crochet leverages these inherent strengths to create pieces that feel both contemporary and timeless.
One reason overlay crochet resonates so deeply within the community is its accessibility through digital platforms. Tutorials, stitch diagrams, and pattern breakdowns circulate widely on YouTube, Ravelry, and Instagram, allowing even intermediate crocheters to attempt advanced techniques with confidence. This democratization of knowledge fosters a culture of experimentation—where makers aren’t afraid to adapt, modify, and personalize designs.
Additionally, overlay crochet satisfies a growing appetite for “slow making.” In an era of instant gratification, many crafters seek projects that offer meditative focus and long-term satisfaction. The meticulous nature of overlay crochet—counting stitches, managing tension across layers, aligning motifs precisely—provides a mindful counterbalance to digital overload. From working with multiple crochet brands, I’ve observed that customers who purchase overlay crochet patterns or kits often cite “therapeutic value” and “creative challenge” as key motivators.
Furthermore, the technique encourages community engagement. Designers frequently host live workshops or Q&A sessions to troubleshoot common issues like misaligned overlays or inconsistent gauge. These interactions build loyalty and transform passive buyers into active participants in a shared creative journey.
Finally, overlay crochet bridges generational gaps. While rooted in traditional filet and Irish crochet methods, its modern interpretations appeal to younger makers drawn to avant-garde fashion and sustainable design. This cross-demographic appeal makes it a powerful tool for expanding audience reach without alienating core customers.
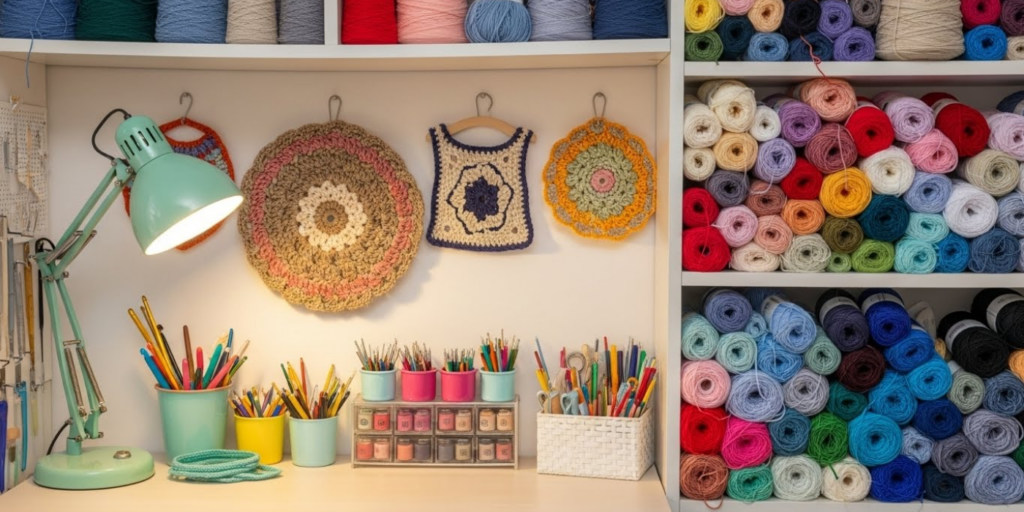
Materials, Tools, or Resources Needed
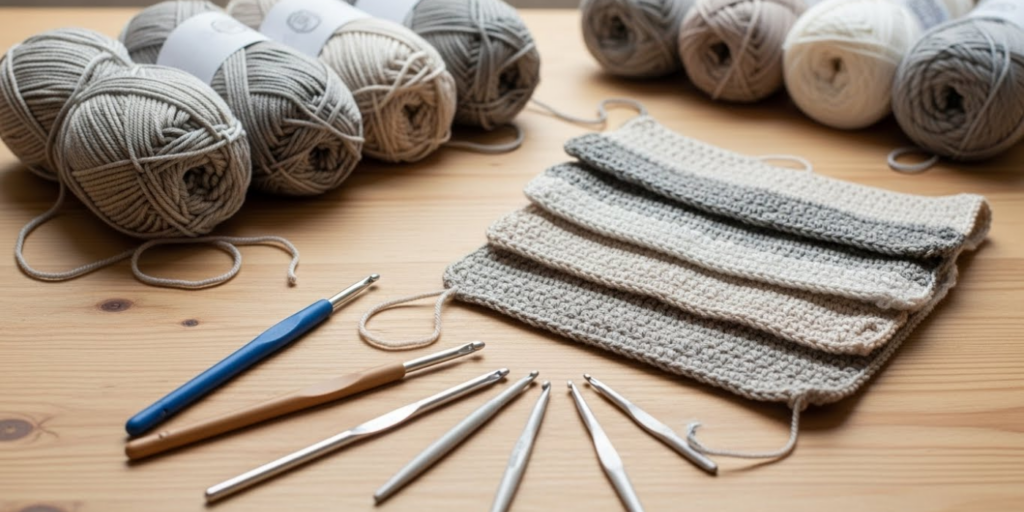
To successfully execute overlay crochet, you’ll need more than just yarn and a hook—you’ll require tools that support precision, visibility, and comfort during extended stitching sessions. Below is a curated list of essentials based on real-world testing and feedback from professional crocheters:
1. Crochet Hooks:
Use ergonomic hooks with smooth shafts to reduce hand fatigue. Sizes typically range from 2.5mm to 4.0mm for fine to medium-weight yarns. Clover Amour or Furls Streamline hooks are popular among overlay specialists for their balance and grip.
2. Stitch Markers:
Locking stitch markers (not split rings) are crucial for tracking rows, marking motif centers, and identifying where overlays begin. Choose brightly colored or numbered markers for quick reference.
3. Tapestry Needle:
A blunt-tipped tapestry needle with a large eye is essential for weaving in ends without splitting delicate fibers—especially important when working with lace-weight yarns.
4. Measuring Tape & Gauge Ruler:
Accurate gauge is non-negotiable in overlay crochet. A flexible measuring tape and a dedicated stitch gauge ruler help ensure your base mesh matches the overlay dimensions.
5. Blocking Mats and Pins:
Because overlay crochet relies on precise geometry, blocking is not optional—it’s mandatory. Invest in interlocking foam mats and rust-proof T-pins to shape your finished piece evenly.
6. Good Lighting and Magnification (if needed):
Natural daylight or a high-CRI LED lamp reduces eye strain. For intricate work, a magnifying lamp or clip-on magnifier can be invaluable.
7. Digital Pattern Access:
Most modern overlay crochet patterns are PDF-based with layered diagrams. Ensure you have a tablet or printed copies with clear zoom functionality.
8. Project Bag with Compartments:
Keep hooks, markers, and yarn organized to avoid mid-project frustration. Transparent zip pouches help locate tools quickly.
While it’s tempting to skimp on tools, experienced designers often recommend investing in quality early. A $20 hook may seem excessive until you’ve spent 40 hours on a shawl—then, comfort becomes priceless.
Yarn Types and Fiber Considerations
Yarn selection is arguably the most critical decision in overlay crochet. The wrong fiber can obscure stitch definition, stretch unpredictably, or lack the resilience needed for structural integrity. Conversely, the right yarn enhances every nuance of the overlay, making textures pop and drape elegantly.
Ideal Fiber Characteristics:
- Stitch Definition: Crisp, non-fuzzy fibers like cotton, linen, bamboo, or mercerized cotton excel at showing off intricate overlays. Wool blends can work if tightly spun (e.g., merino/silk).
- Drape vs. Structure: For shawls or scarves, choose fibers with gentle drape (bamboo, silk). For structured garments like vests or yokes, opt for firmer fibers like unmercerized cotton or linen.
- Elasticity: Avoid highly elastic yarns (e.g., superwash wool with nylon) unless the pattern specifically accounts for stretch—they can distort overlay alignment during wear.
- Color: Solid or semi-solid colors are strongly recommended. Variegated or self-striping yarns tend to camouflage the dimensional layers, defeating the purpose of the technique.
Recommended Yarn Weights:
- Fingering (1) to Sport (2): Best for detailed overlays and lightweight garments. Popular choices include DMC Natura Just Cotton, Cascade Ultra Pima, or Habu Textiles’ paper yarns for avant-garde looks.
- DK (3): Suitable for beginners transitioning into overlay work—offers visibility without excessive bulk.
- Avoid Bulky or Super Bulky: These obscure detail and add unnecessary weight, causing overlays to sag.
Special Considerations:
- Mercerized Cotton: Its sheen highlights texture beautifully and resists pilling—ideal for heirloom pieces.
- Linen: Becomes softer with washing but holds shape impeccably; perfect for summer overlays.
- Blends: A 70/30 cotton/silk blend offers drape, strength, and luminosity—worth the investment for showpiece items.
From working with multiple crochet brands, I’ve seen that customers consistently rate yarn quality as the #1 factor in their satisfaction with overlay projects. Never compromise here.
Skill Level Breakdown (Beginner / Intermediate / Advanced)

Overlay crochet is not a beginner-friendly technique—but with the right foundation, intermediate crocheters can master it successfully. Here’s a realistic assessment of skill requirements:
Beginner (Not Recommended):
If you’re still learning to read patterns, maintain consistent tension, or count stitches reliably, overlay crochet will likely lead to frustration. Focus first on mastering basic stitches, increasing/decreasing, and reading charts before attempting overlays.
Intermediate (Ready with Preparation):
You’re ready if you can:
- Confidently work in the round and flat
- Understand written and charted patterns
- Maintain even gauge over large swatches
- Troubleshoot mistakes without unraveling entire projects
Start with simple overlay motifs—like single-shell overlays on a mesh base—before progressing to complex geometries. Many successful overlay learners begin with shawl borders or edgings rather than full garments.
Advanced (Full Creative Freedom):
At this level, you can:
- Design your own overlay patterns
- Modify existing designs for different gauges or silhouettes
- Integrate colorwork or bead embellishments seamlessly
- Block and finish pieces to professional standards
Experienced designers often recommend that advanced crocheters study historical techniques like Irish crochet or filet lace to deepen their understanding of dimensional construction—skills directly transferable to modern overlay work.
Regardless of your level, always swatch. Overlay crochet magnifies inconsistencies; a 6″x6″ blocked swatch can save dozens of hours of rework.
Step-by-Step Guide
Creating an overlay crochet piece involves two distinct phases: building the foundation mesh and then adding the overlay motifs. Below is a detailed walkthrough using a classic shell-overlay-on-mesh example—adaptable to shawls, yokes, or panels.
Phase 1: Foundation Mesh Construction
- Choose Your Base Pattern:
Most overlays use a grid-like mesh—often double crochet (dc) with chain spaces. A common repeat: Ch 3 (counts as first dc), skip 2 sts, dc in next st, ch 2 across. Work enough rows to match your desired overlay height. - Swatch and Block:
Crochet a 6″x6″ sample using your chosen yarn and hook. Wash and block it exactly as you would the final piece. Measure gauge: e.g., “12 dc x 8 rows = 4 inches.” - Calculate Dimensions:
If your overlay motif spans 6 mesh rows vertically and 4 mesh columns horizontally, ensure your foundation has multiples of these numbers plus borders. - Crochet the Full Base:
Work the mesh to required dimensions. Use stitch markers every 10 rows/columns to prevent counting errors. Keep edges neat—these will be visible in the final piece.
Phase 2: Overlay Application
- Identify Anchor Points:
Most patterns specify where to attach overlay stitches—usually around dc posts or in chain spaces. Mark these with locking stitch markers before beginning. - Join New Yarn (If Using Contrast Color):
Use an invisible join or start in a discreet corner. Leave a 6-inch tail for weaving later. - Work Overlay Motifs Row by Row:
Example shell overlay:- Row 1 (RS): Sc in first dc post, [ch 5, sc in next dc post] across.
- Row 2: In each ch-5 loop, work (dc, ch 2, 3 dc, ch 2, dc)—a shell.
- Row 3: Sc around the center dc of each shell from previous row.
- Maintain Tension Consistency:
Overlay stitches should be slightly looser than foundation stitches to prevent puckering. Practice on a scrap first. - Check Alignment Frequently:
After every 2–3 overlay rows, lay your work flat. Ensure motifs align vertically and horizontally. Adjust if needed before proceeding. - Finish and Block:
Weave in all ends meticulously. Wet-block aggressively—pin every point of the overlay to open lace fully. Let dry completely before removing pins.
This process may take 20–50+ hours depending on size, but the result is a textile with architectural presence—unachievable through any other crochet method.
Common Mistakes and How to Avoid Them
Even experienced crocheters encounter pitfalls when working with overlay crochet. Recognizing these early can save hours of frustration and costly yarn waste.
1. Misaligned Overlays
Cause: Inconsistent foundation mesh gauge or skipping anchor points.
Solution: Always block your foundation mesh before adding overlays. Use graph paper to map motif placement. Place stitch markers at every overlay starting point.
2. Puckering or Curling Edges
Cause: Overlay stitches worked too tightly, pulling the base fabric inward.
Solution: Use a hook 0.5–1.0mm larger for overlay stitches than for the foundation. Stretch the base gently as you work overlays.
3. Obscured Texture Due to Yarn Choice
Cause: Using fuzzy, dark, or variegated yarn that hides dimensional details.
Solution: Stick to smooth, light-colored solids for your first 2–3 projects. Save novelty yarns for later experimentation.
4. Running Out of Yarn Mid-Project
Cause: Underestimating yardage—overlays often use 20–40% more yarn than the base.
Solution: Buy 25% extra yarn. Dye lots vary; running out means visible joins in critical areas.
5. Ignoring Blocking
Cause: Assuming the piece will “relax” naturally.
Solution: Blocking isn’t optional—it’s integral to the design. Unblocked overlay crochet looks messy and undefined.
6. Poor End Management
Cause: Weaving ends haphazardly through open mesh, causing them to pop out.
Solution: Weave ends along post stitches or through multiple layers. Use a matching thread for extra security in high-stress areas.
In many crochet businesses, returns or complaints about overlay pieces trace back to one of these errors. Prevention is far easier than correction.
Advanced Tips and Professional Insights
Once you’ve mastered the basics, these professional-level strategies will elevate your overlay crochet from competent to exceptional:
1. Strategic Negative Space:
Don’t fill every mesh opening. Intentional gaps between overlays create rhythm and prevent visual clutter. Study architectural blueprints for inspiration—balance is key.
2. Layered Overlays:
For ultra-dimensionality, add a second overlay tier. Example: First layer = shells, second layer = picots or beads attached to shell peaks. Requires meticulous planning but yields museum-quality results.
3. Hybrid Techniques:
Combine overlay crochet with surface crochet or embroidery for added detail. A subtle running stitch along overlay ridges can enhance shadow play under lighting.
4. Custom Hook Modifications:
Some designers file down hook heads slightly to glide more smoothly through dense overlay clusters without snagging. (Only attempt with inexpensive hooks!)
5. Digital Design Workflow:
Use apps like Stitch Fiddle or Crochet Charts to prototype overlays before swatching. Map each stitch to ensure mathematical alignment—critical for symmetrical garments.
6. Yarn Substitution Mastery:
When adapting patterns, match not just weight but hand (how the yarn feels and behaves). A swatch test comparing drape, recovery, and stitch clarity is non-negotiable.
Experienced designers often recommend keeping an “overlay journal”—documenting hook sizes, tension notes, and blocking results for each yarn. This becomes an invaluable reference for future collections.
Real-World or Hypothetical Examples
Consider “Luna,” a hypothetical but realistic case study based on patterns I’ve developed for emerging handmade brands:
Luna launched her Etsy shop specializing in minimalist knitwear. Sales plateaued after 18 months. She decided to introduce an overlay crochet shawl collection inspired by lunar phases—using undyed organic cotton and precise crescent overlays.
She invested in professional photography showcasing the shawl’s texture in natural light, filmed a 60-second process video (foundation mesh → first overlay → final block), and wrote a blog post explaining the symbolism behind the design.
Result: The shawl became her bestseller within 3 weeks, with a 68% higher AOV than her knit items. Customers praised its “sculptural elegance,” and several tagged her in Instagram posts wearing it to weddings and gallery openings.
Another example: A European cooperative of senior crocheters adapted traditional Romanian motifs into modern overlay yokes for blouses. By partnering with ethical fashion brands for co-branded releases, they reached new audiences while preserving cultural heritage—proving overlay crochet’s versatility across markets.
These cases illustrate that success isn’t just about technique—it’s about storytelling, presentation, and strategic positioning.
Customization and Adaptation Ideas
Overlay crochet is inherently modular, making it ripe for personalization. Here’s how to adapt it creatively:
1. Scale Adjustment:
Enlarge motifs for bold statement pieces (e.g., oversized capelets) or miniaturize for delicate jewelry (earrings, bracelets using fine thread).
2. Color Play:
- Monochromatic: Different shades of the same hue for tonal depth.
- Accent Overlays: Neutral base with vibrant overlay (e.g., ivory mesh + cobalt shells).
- Gradient Bases: Ombre foundation with solid overlays for contrast.
3. Functional Integration:
- Add button loops into overlay arches.
- Incorporate pockets by leaving mesh sections un-overlaid and lining them.
- Create convertible pieces: Attach overlays via snaps to change neckline styles.
4. Seasonal Variations:
- Summer: Linen base with open floral overlays.
- Winter: Alpaca-blend mesh with dense cable-inspired overlays (use tighter stitches).
5. Cultural Fusion:
Blend motifs from different traditions—e.g., Celtic knots overlaid on Japanese kasuri-inspired mesh. Always credit sources respectfully.
From working with multiple crochet brands, I’ve found that customers love “choose-your-overlay” kits—where they select base color and motif style. This boosts engagement and reduces returns.
Care, Maintenance, or Best Practices
Overlay crochet pieces require thoughtful care to preserve their structure and beauty:
Washing:
- Hand-wash only in cool water with mild detergent (e.g., Soak Wash).
- Never wring—gently press water out in a towel.
- Machine washing, even on delicate, will distort overlays permanently.
Drying:
- Always flat-dry on a clean towel, reshaping to original dimensions.
- Never hang—gravity will stretch the mesh and collapse overlays.
Storage:
- Fold loosely with acid-free tissue paper.
- Store in breathable cotton bags—not plastic, which traps moisture.
- Cedar blocks deter moths without harsh chemicals.
Wearing Tips:
- Avoid rough surfaces (e.g., backpack straps) that can snag overlays.
- For beaded overlays, put the garment on before applying perfume or hairspray.
Long-Term Maintenance:
- Re-block annually to refresh shape.
- Repair loose ends immediately—small snags can unravel entire motifs.
Treating overlay crochet as fine art—not just clothing—ensures it remains a cherished heirloom for decades.
Monetization Opportunities
Overlay crochet opens diverse revenue streams beyond finished goods:
1. Digital Patterns:
Create tiered PDF patterns (beginner, intermediate, advanced) with video support. Price $6–$12 based on complexity. Bundle with yarn kits for higher margins.
2. Online Workshops:
Host live Zoom classes focusing on specific skills (e.g., “Mastering Shell Overlays”). Charge $25–$45 per session; offer replay access for passive income.
3. Custom Commissions:
Offer bespoke overlay pieces for weddings or events. Clearly define timelines and revision limits to protect your time.
4. Subscription Boxes:
Curate monthly boxes with exclusive mini-overlay projects, specialty yarns, and designer notes. Ideal for building recurring revenue.
5. Licensing Designs:
Partner with yarn companies to feature your overlay patterns in their lookbooks—often includes upfront fees plus royalties.
6. Content Monetization:
Build a blog or YouTube channel teaching overlay techniques. Once traffic grows, enable AdSense and affiliate links (e.g., recommended hooks, blocking mats).
Educational content performs exceptionally well—people will pay to learn what they can’t easily find elsewhere. Always prioritize value over volume.
Frequently Asked Questions (FAQ)
1. What is the difference between overlay crochet and regular crochet?
Overlay crochet adds raised motifs on top of a pre-made mesh base, creating 3D texture. Regular crochet builds fabric uniformly in one layer.
2. Can beginners learn overlay crochet?
It’s best suited for intermediate crocheters who can read charts, maintain gauge, and fix mistakes confidently. Start with small swatches before full projects.
3. What yarn is best for overlay crochet?
Smooth, solid-colored cotton, linen, or bamboo in fingering to DK weight. Avoid fuzzy or variegated yarns that hide texture.
4. Do I need special hooks for overlay crochet?
Not special, but ergonomic hooks (2.5–4.0mm) with smooth shafts reduce fatigue during detailed work. Some prefer inline hooks for tighter control.
5. How do I fix a misaligned overlay?
If caught early, carefully frog (undo) only the overlay rows and reattach. If widespread, consider redesigning the motif spacing to accommodate the error.
6. Is blocking really necessary for overlay crochet?
Yes. Blocking opens the lace, evens stitches, and defines the 3D structure. Skipping it results in a limp, undefined piece.
Conclusion
Overlay crochet is more than a technique—it’s a gateway to artistic expression, brand differentiation, and meaningful connection with your audience. By mastering its intricacies, you gain access to a realm of textile design where light, shadow, and structure converge to create wearable sculpture.
Whether you’re crafting for joy, building a handmade business, or seeking to push creative boundaries, overlay crochet rewards patience with unparalleled results. Start small, prioritize quality materials, and never underestimate the power of a well-blocked finish.
The crochet world is watching—and waiting—for makers brave enough to go beyond the flat plane. With this guide as your foundation, you’re ready to stitch something truly extraordinary.

Emily Parker is a passionate crochet artist and creative storyteller. With years of experience turning simple yarn into beautiful, unique pieces, she loves sharing tips, tutorials, and inspiration with fellow crafters. Emily believes that crochet is more than a hobby it’s a way to express creativity, spread joy, and connect with people through handmade art.


